
1.Cut 6 lengths of string, each about 90 cm long. Sear the ends using a lighter to prevent unravelling. 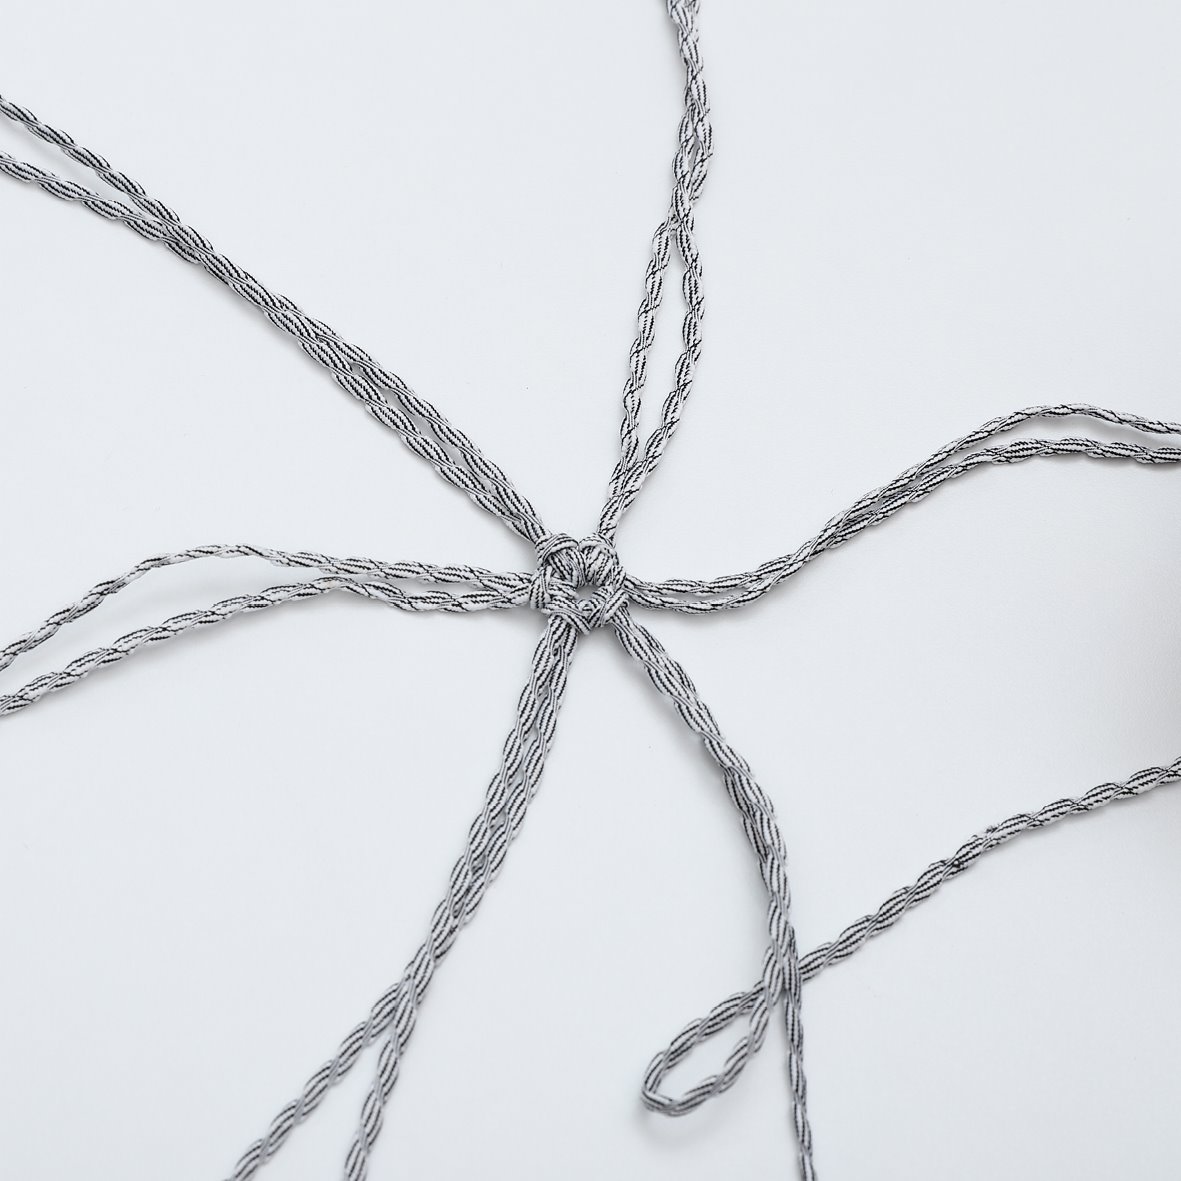
2.Fold one length of string in half. Place this on the table in front of you. Fold a second length of string. Tie it around the first as shown in the picture. Repeat using the next 4 lengths of string. 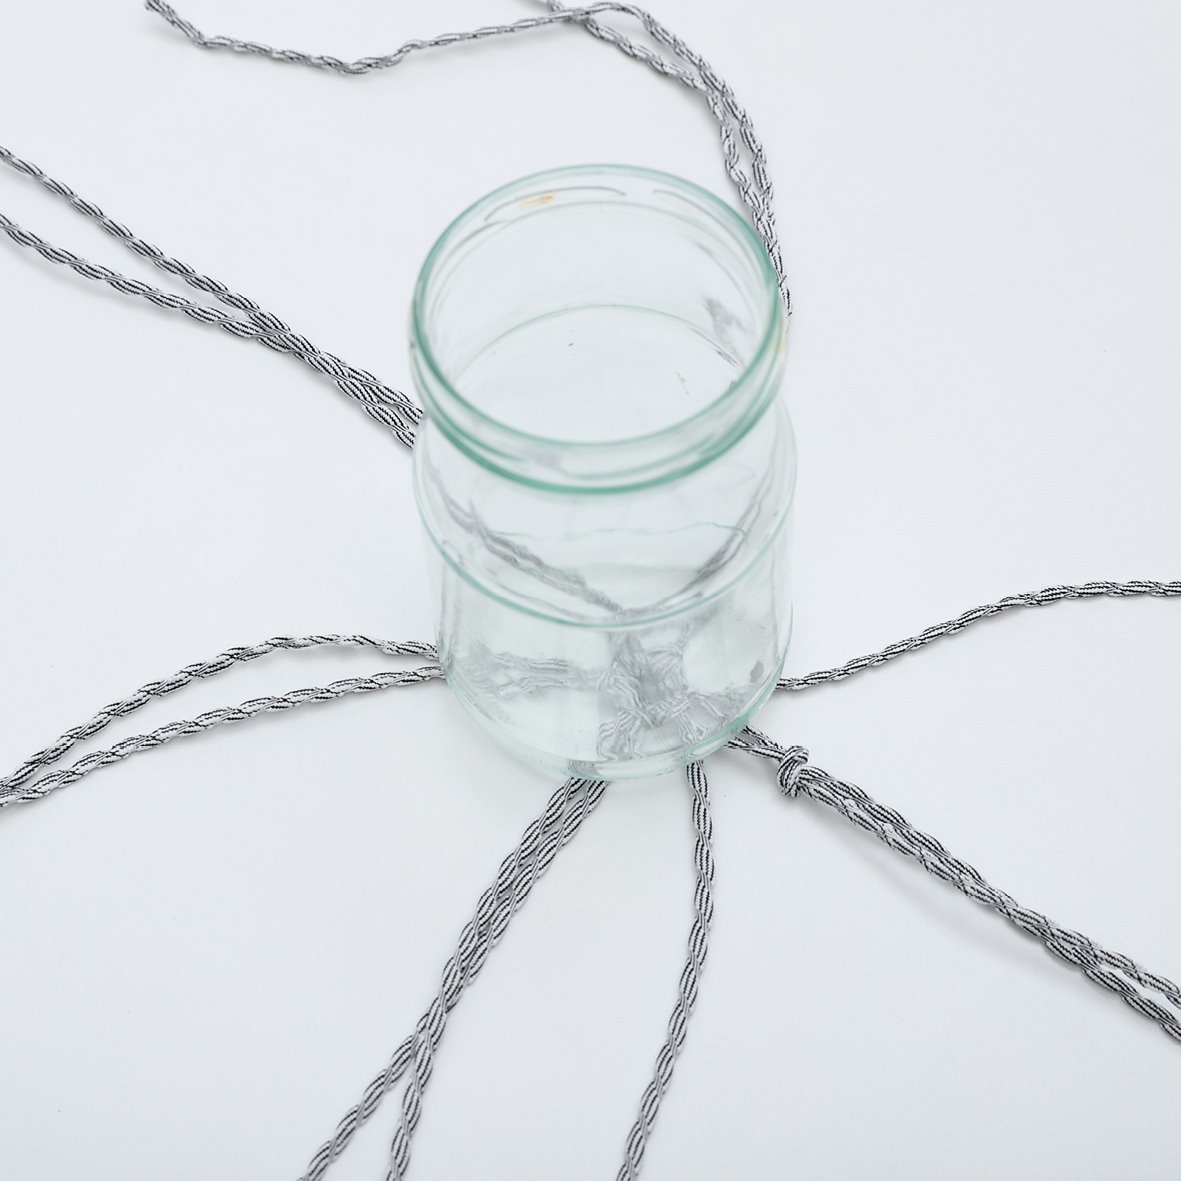
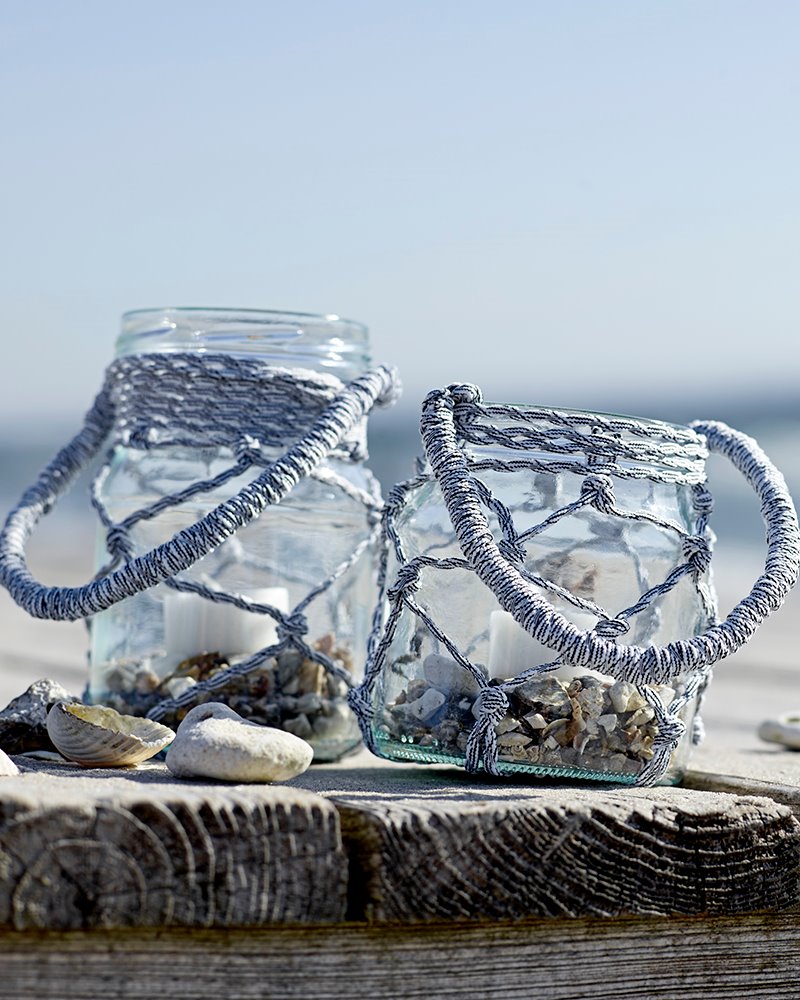
3.Bring string ends through the loop. Pull to form a star. The “star” forms the base. Now knot from the bottom of the jar upwards, all the way around it, as shown. 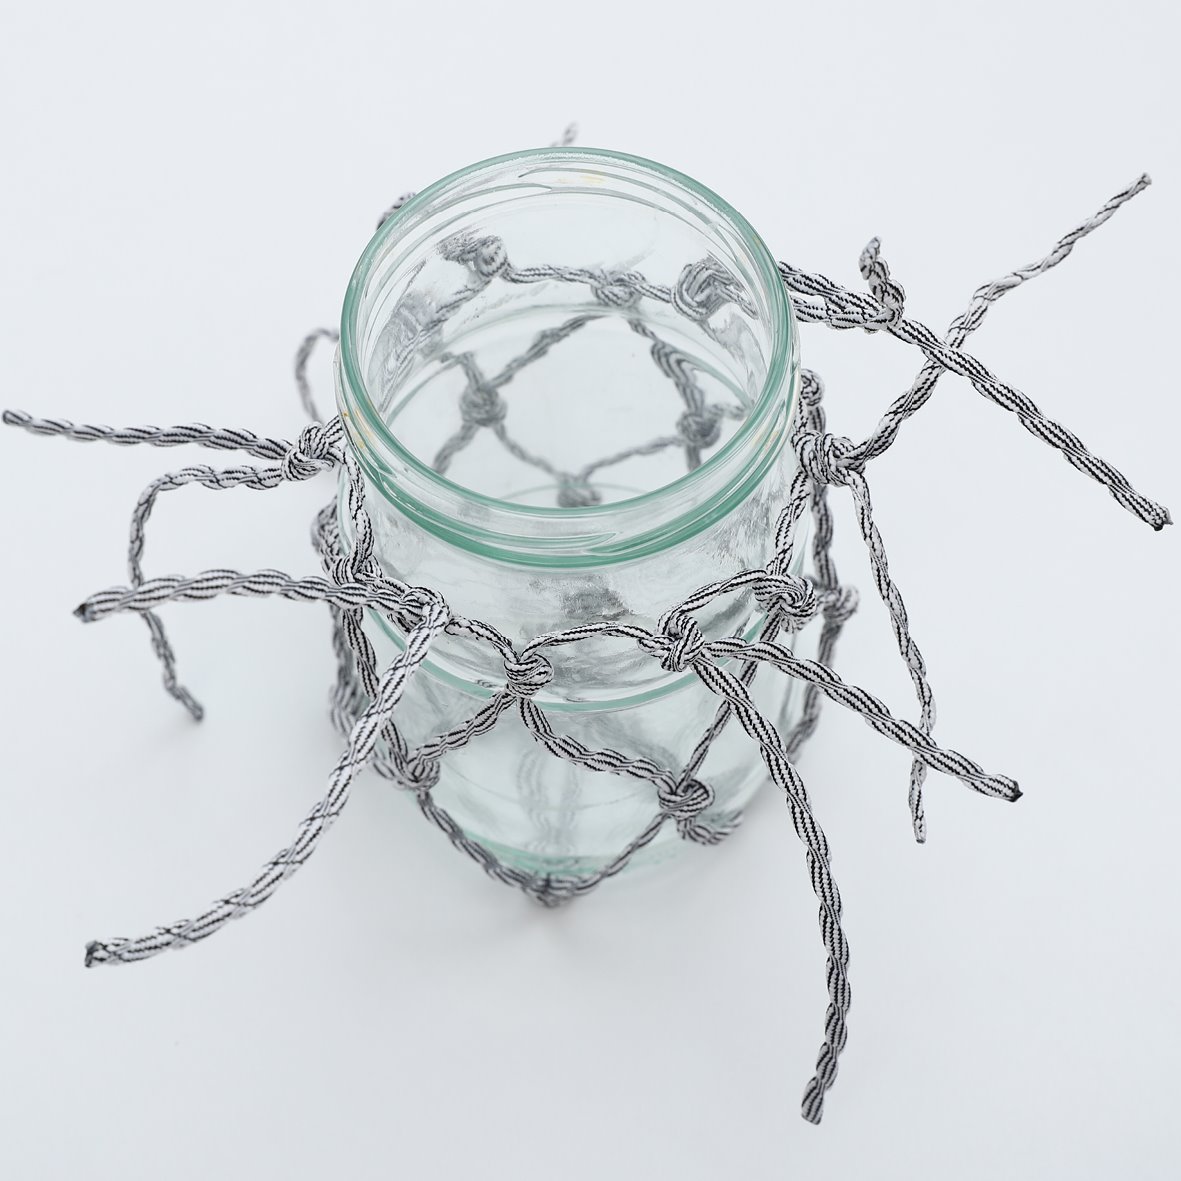
4.When the knots reach the top, trim ends. Allow 2 cm of extra string above the last knot. 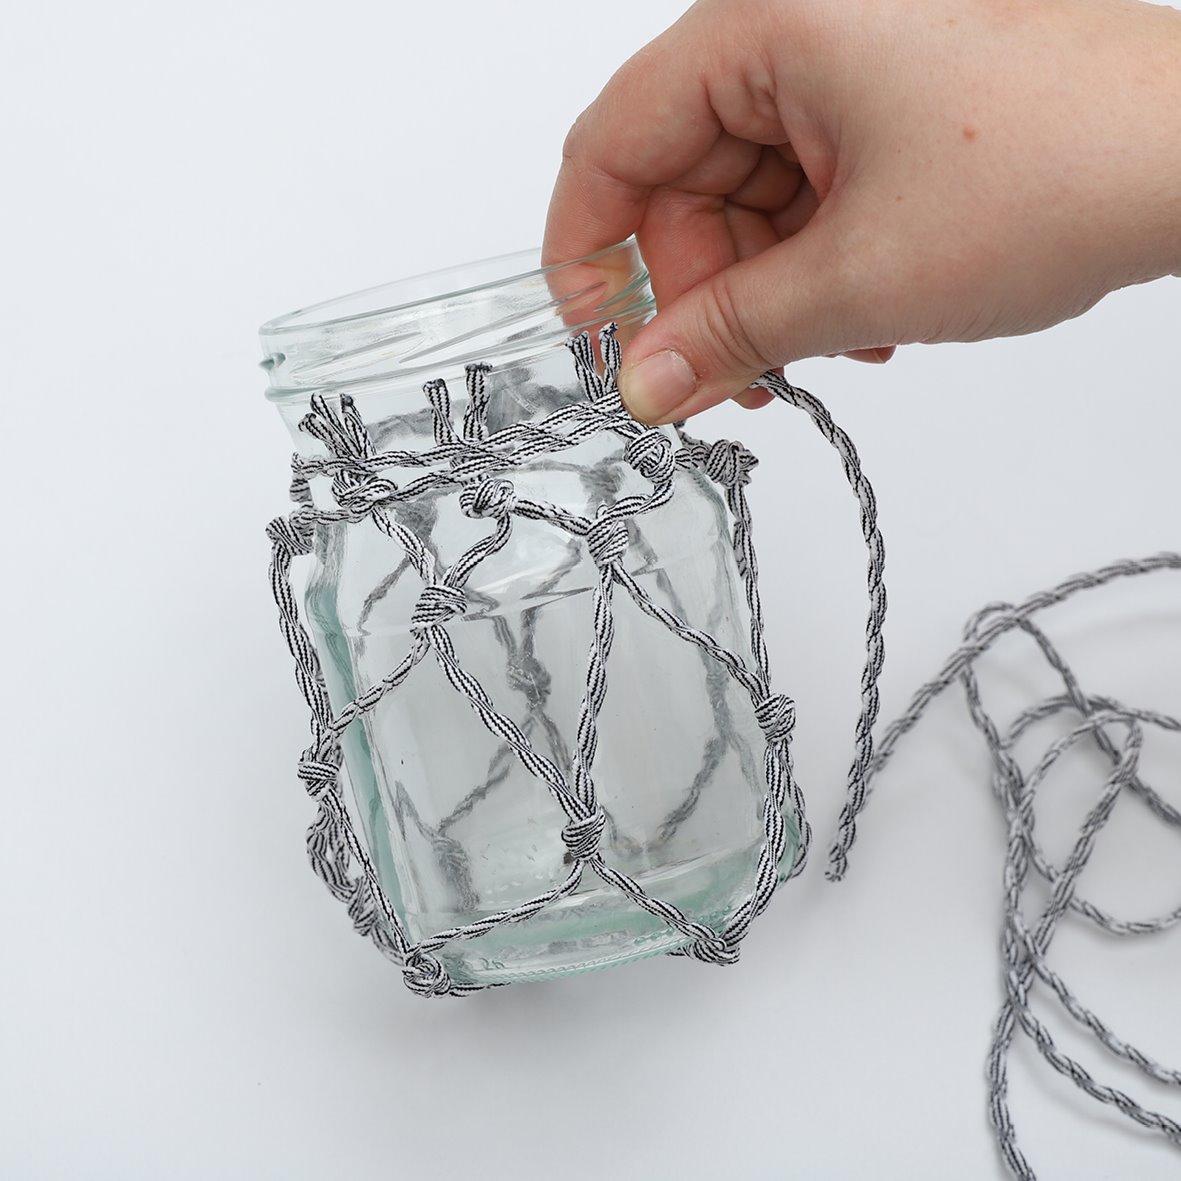
5.Cut a length of string about 170 cm long to wind around the neck of the jar. Tie one end to one of the top knots. Dab a spot of adhesive to glue this knot to the jar while you wind string around the jar neck. 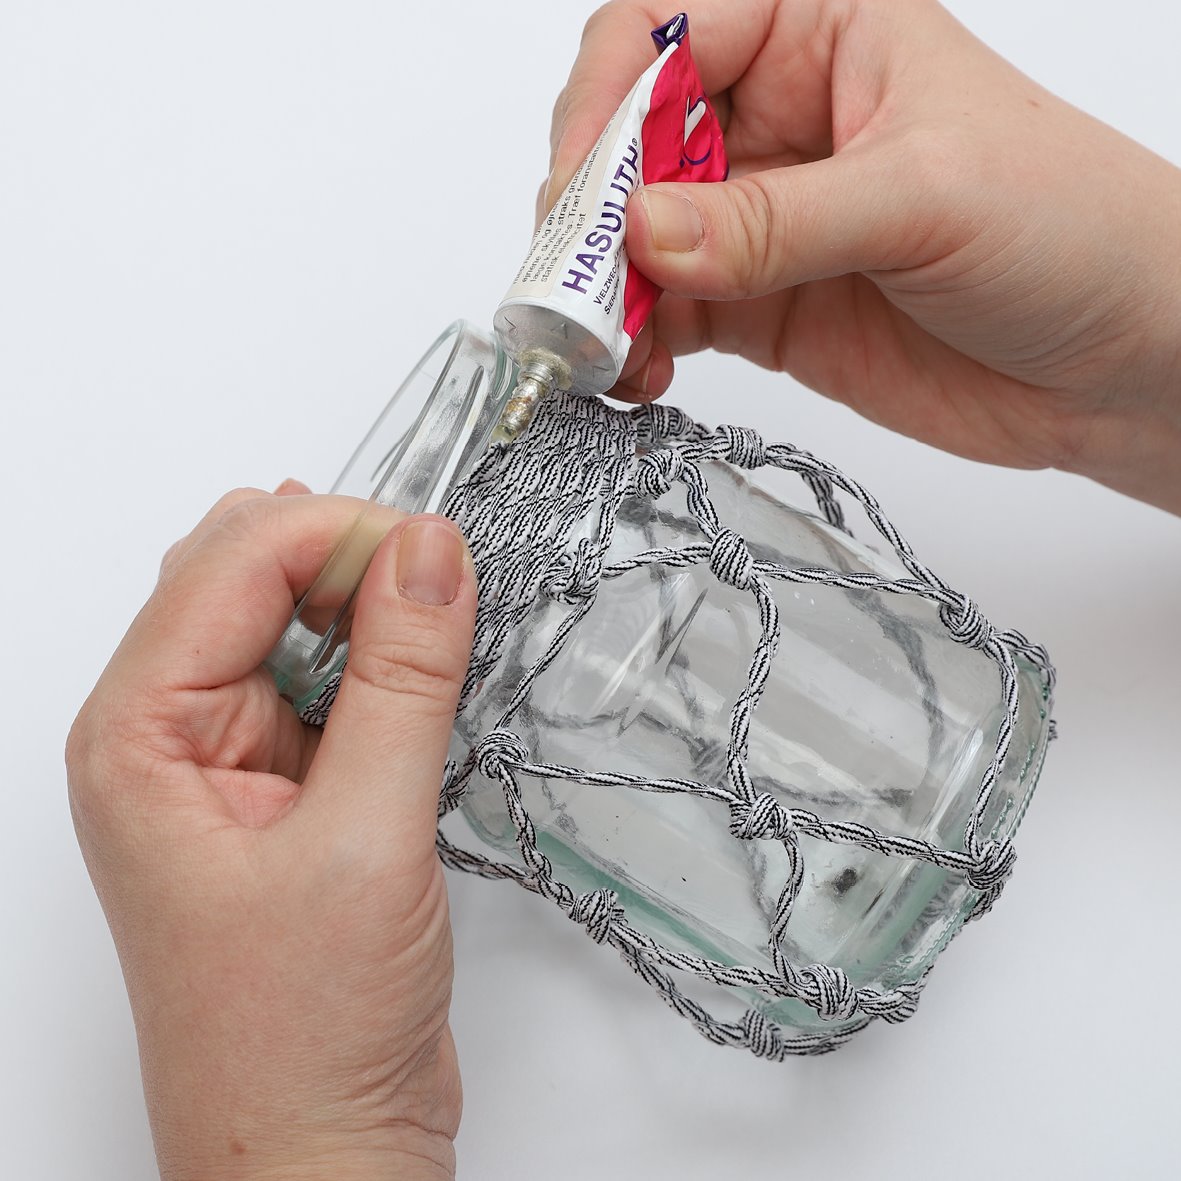
6.Wind the string around the jar neck. Dab a spot of adhesive to the end and tuck it in under the wound jar neck. 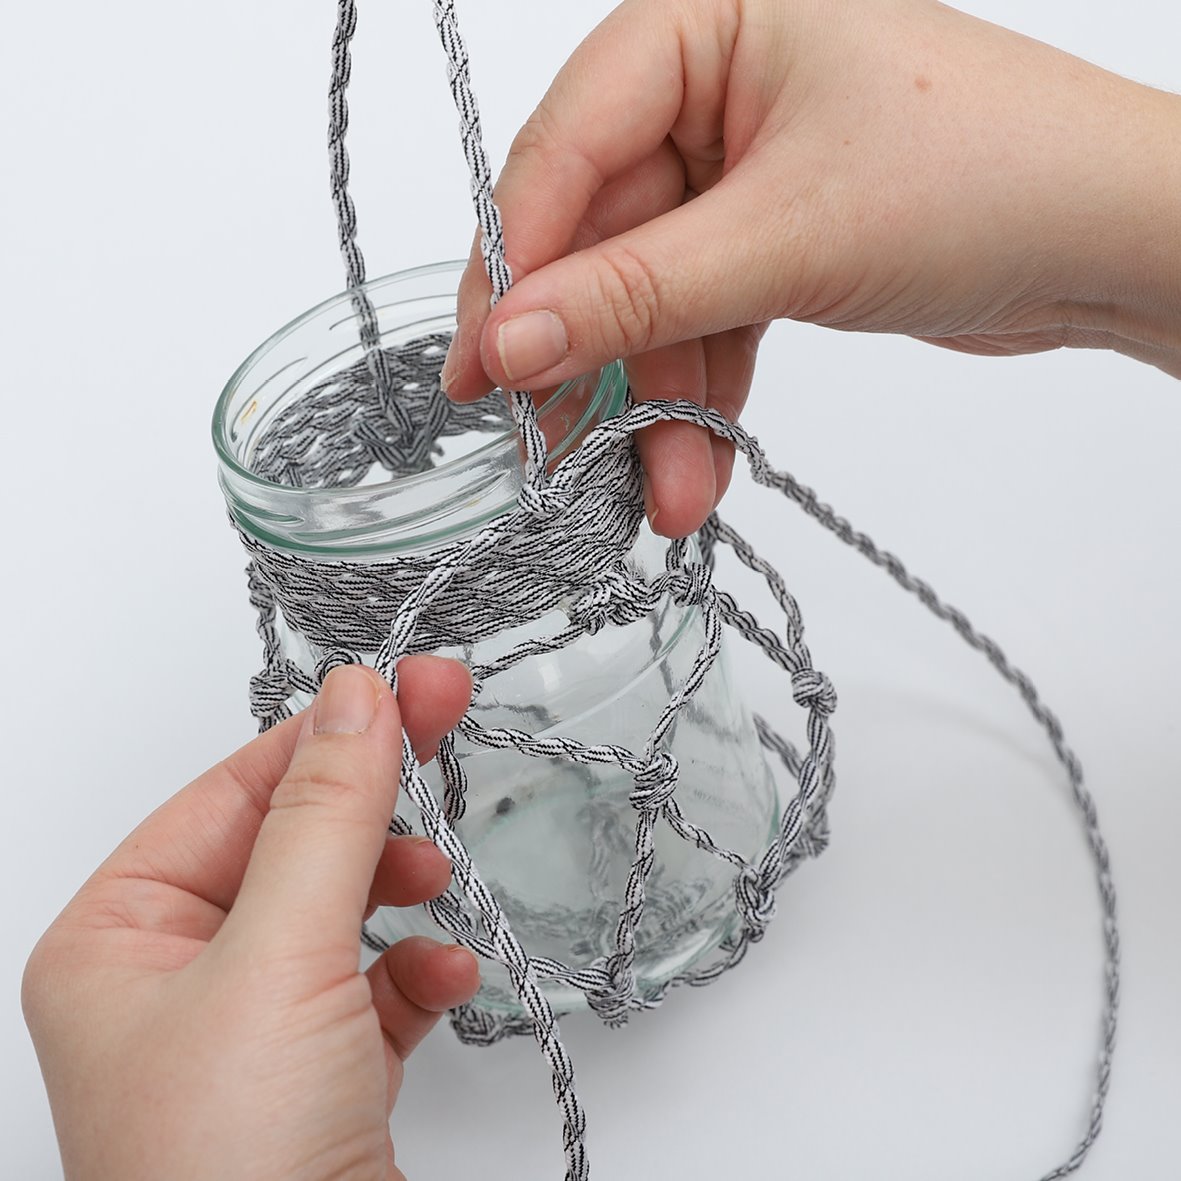
7.Cut a length of string about 100 cm long. Tuck the end in under the wound jar neck and secure with a knot. Add a spot of adhesive and hide the end by tucking it in under the wound jar neck. To make a handle, tie the string to the opposite side of the jar neck. Bring it back the other way. Secure. If you need a stronger/thicker handle, you can wind string around these two strings, as follows. 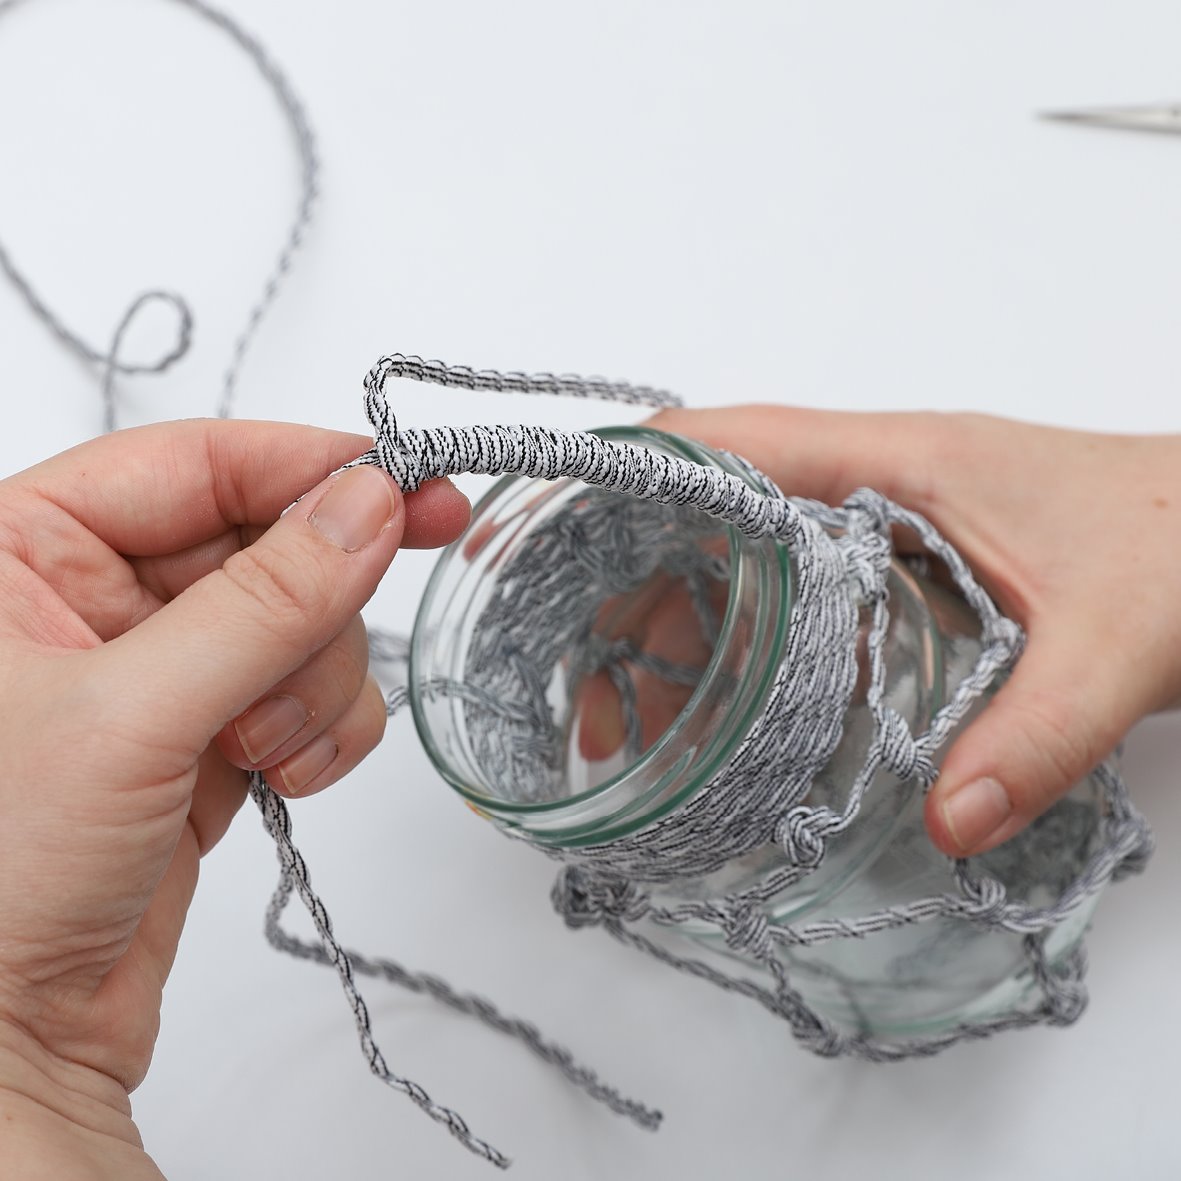
8.Cut a length of string about 190 cm long. Tuck the end in under the jar neck. Carefully wind this string around the 2 strings of the handle. Bind tightly to conceal any loose ends. Tie off. Add a spot of adhesive and tuck the ends in under the wound jar neck.