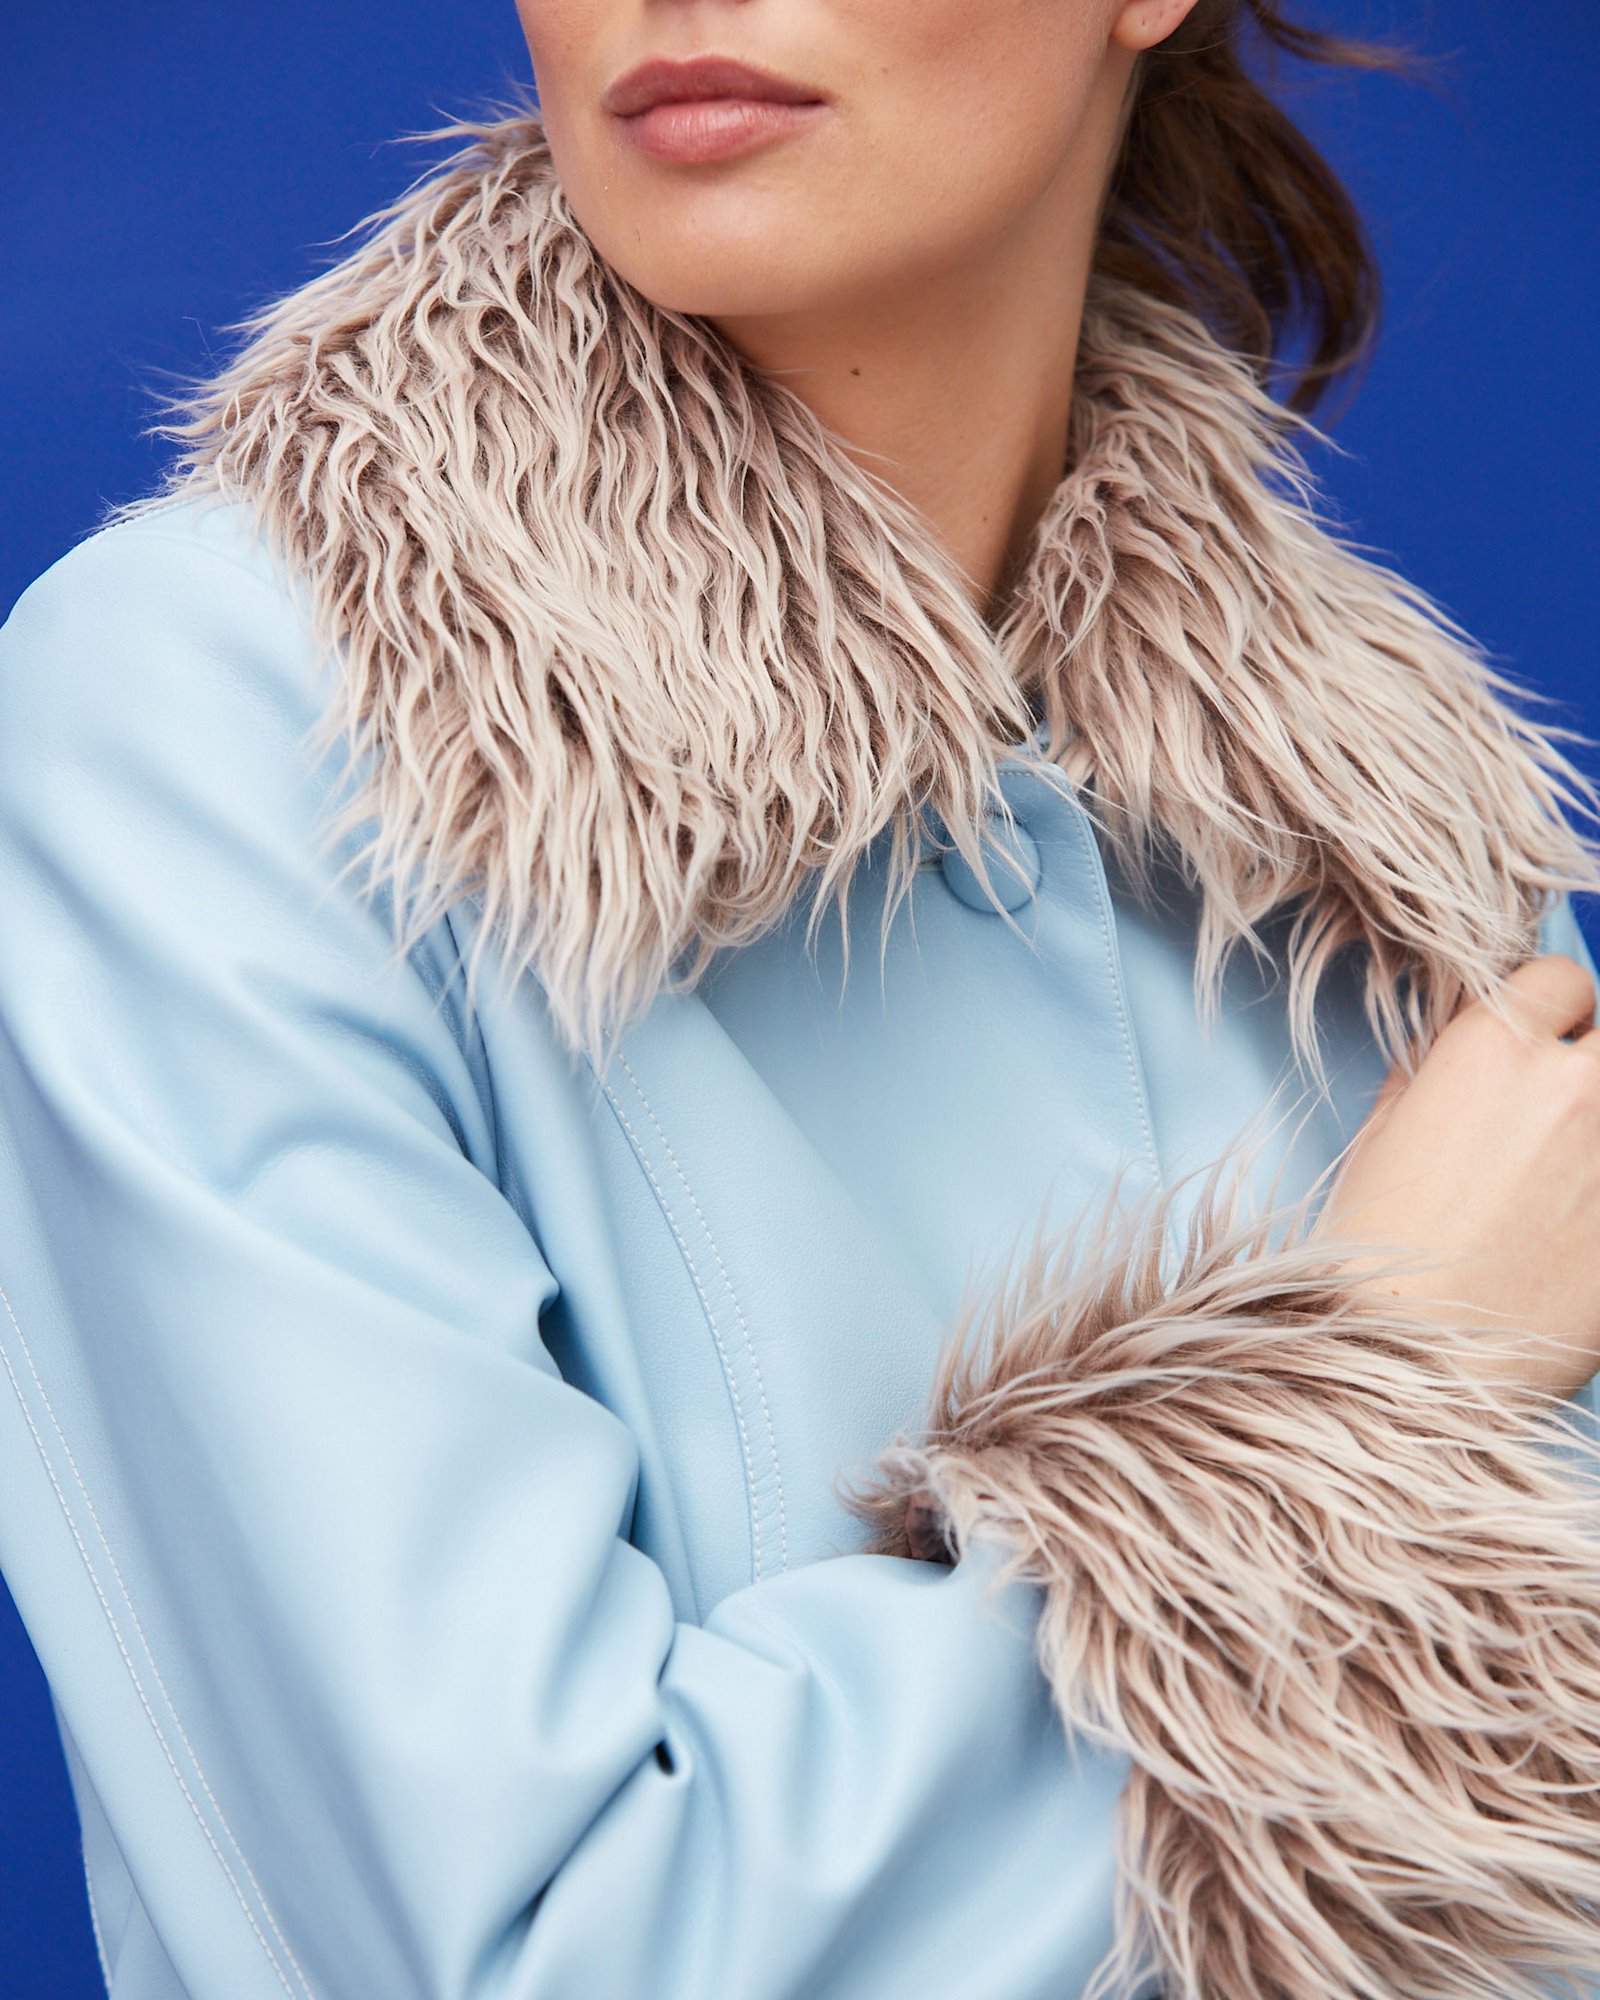
Sew it yourself: Detachable fur collar
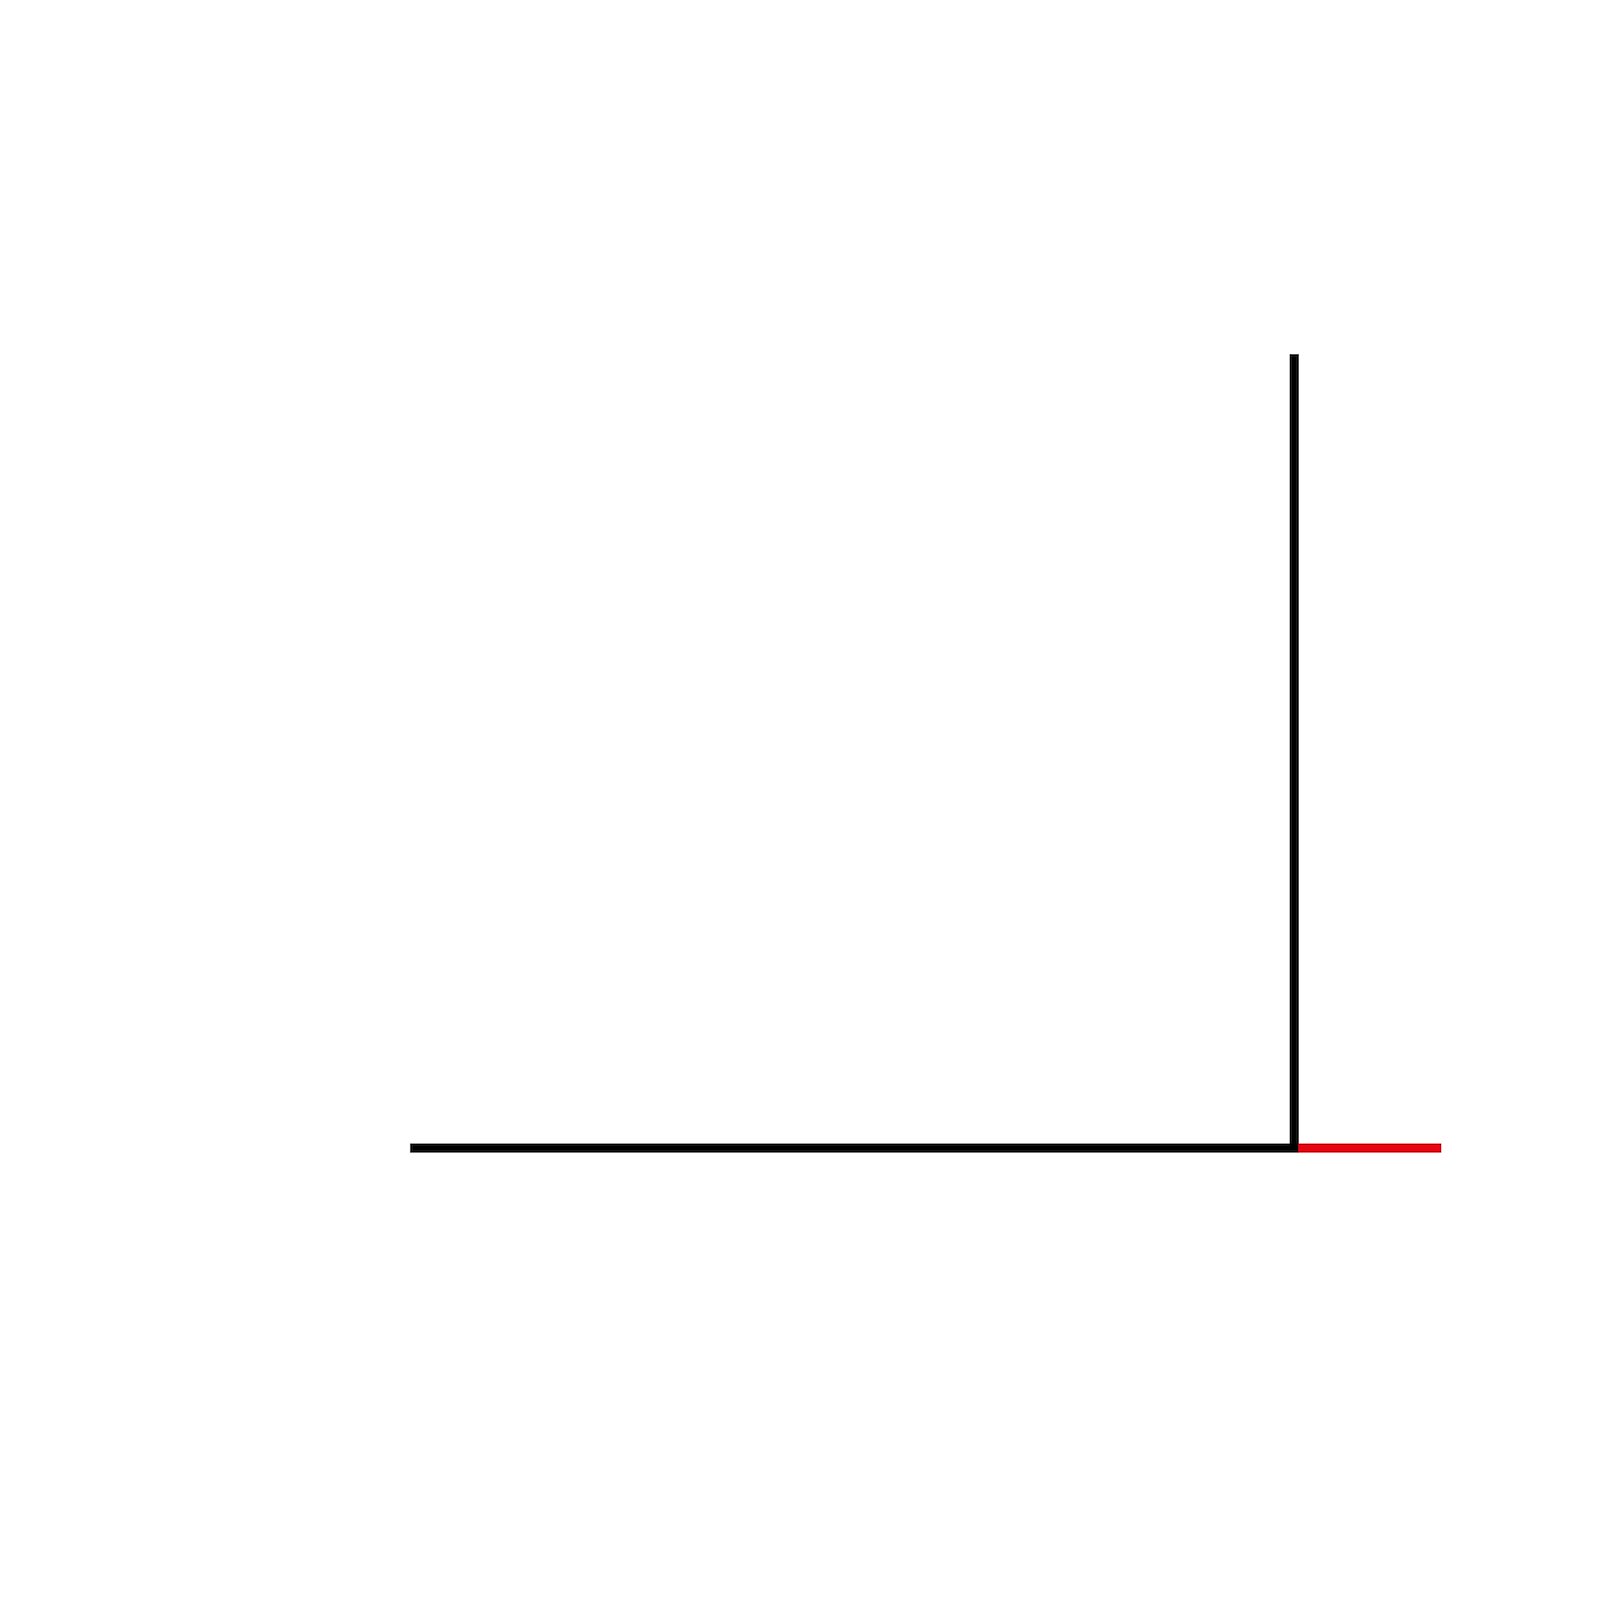
1.Draw 2 lines approx. 15 cm perpendicular to each other. Extend the horizontal line about 3 cm to the right. 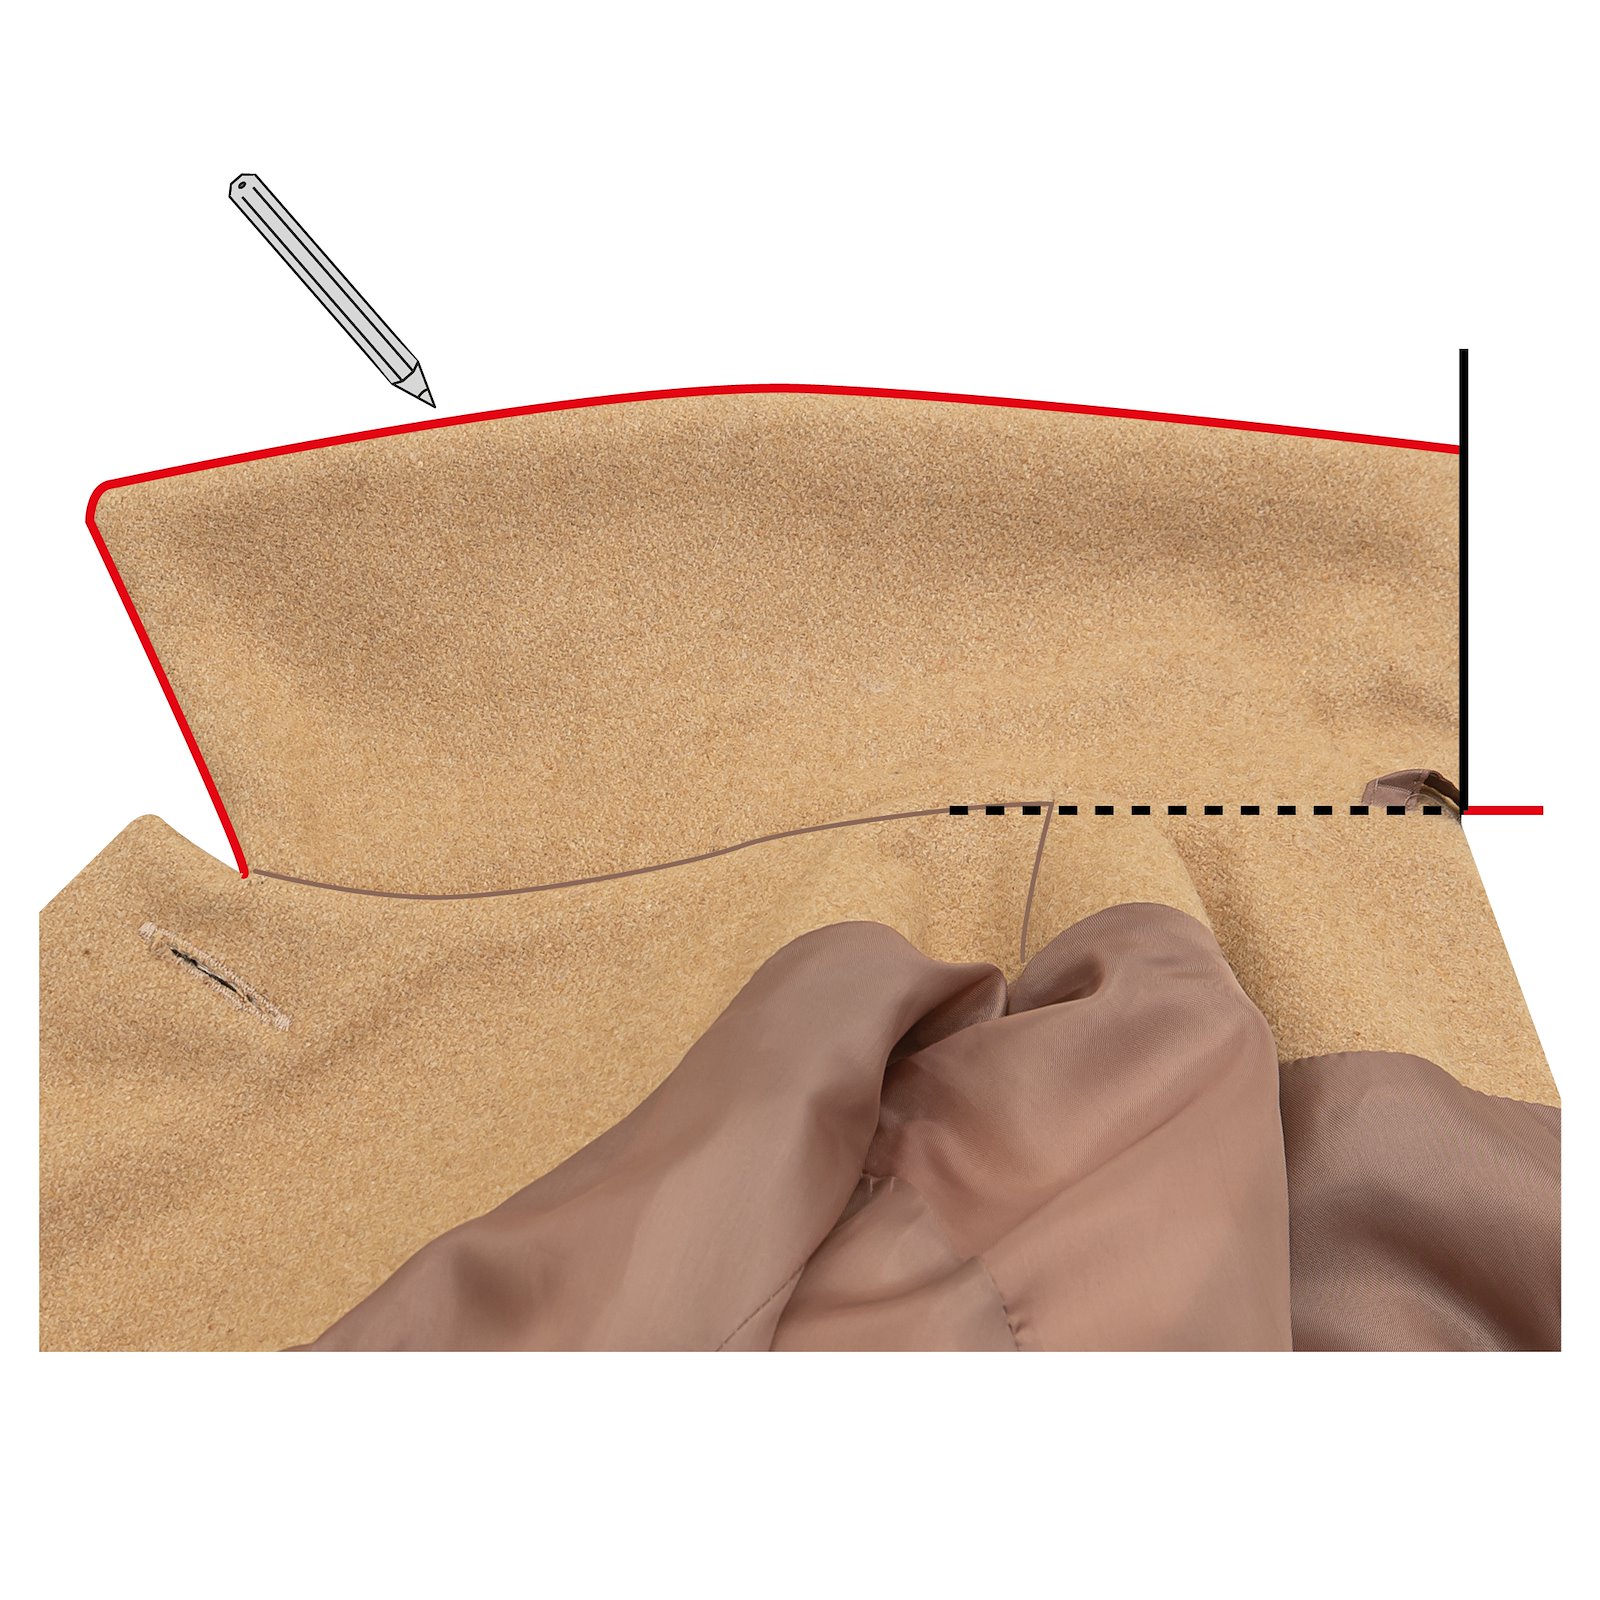
2.Fold the collar in half and place it on the drawn angle. The collar neck seam on the back of the jacket must be on the horizontal line. Draw the outer line of the collar. 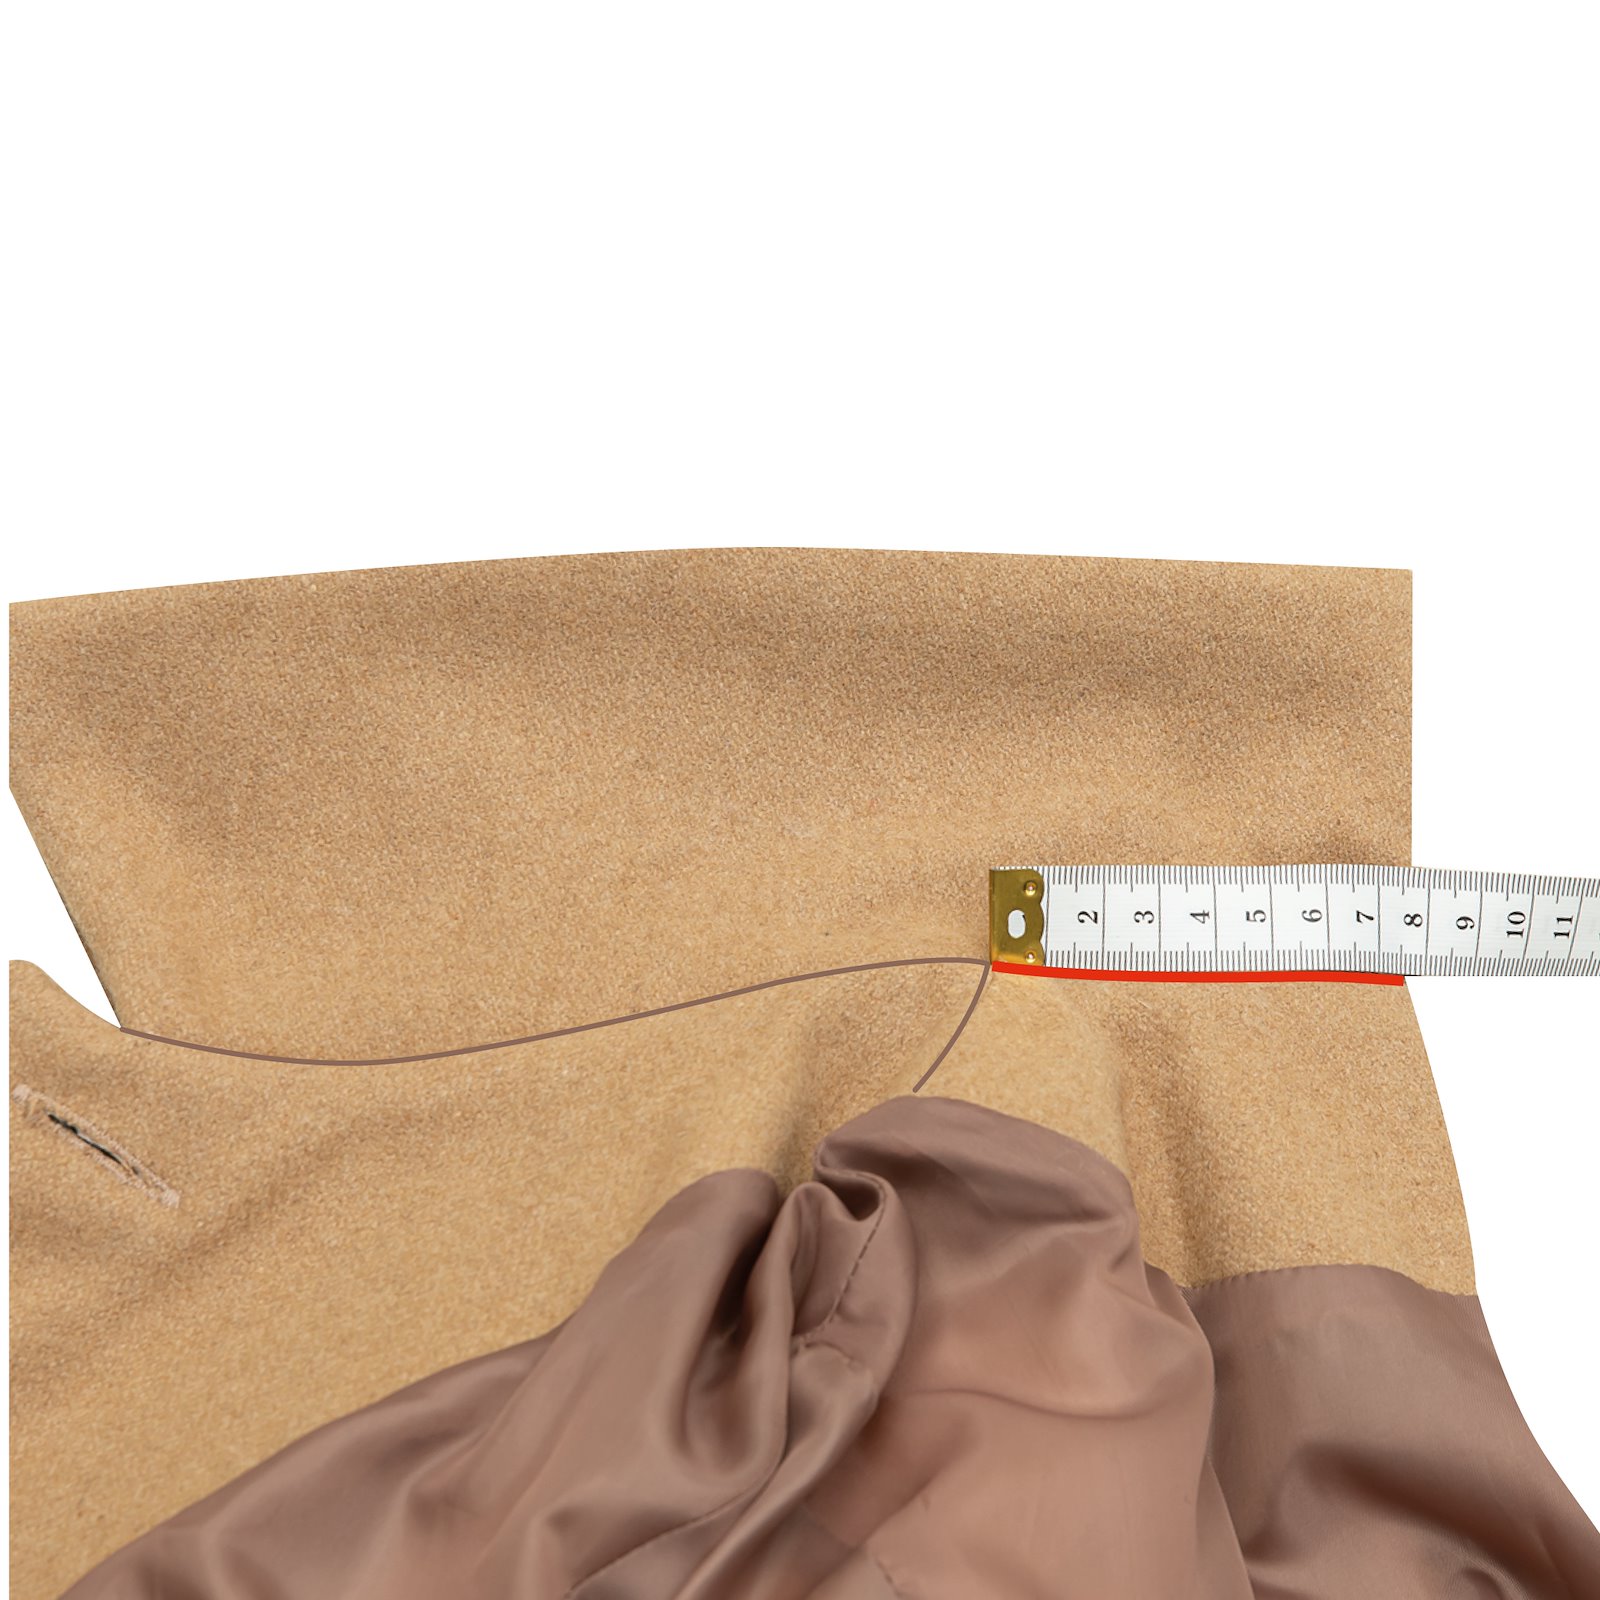
3.Measure the collar neck seam on the back of the jacket, in this example it is 8 cm. 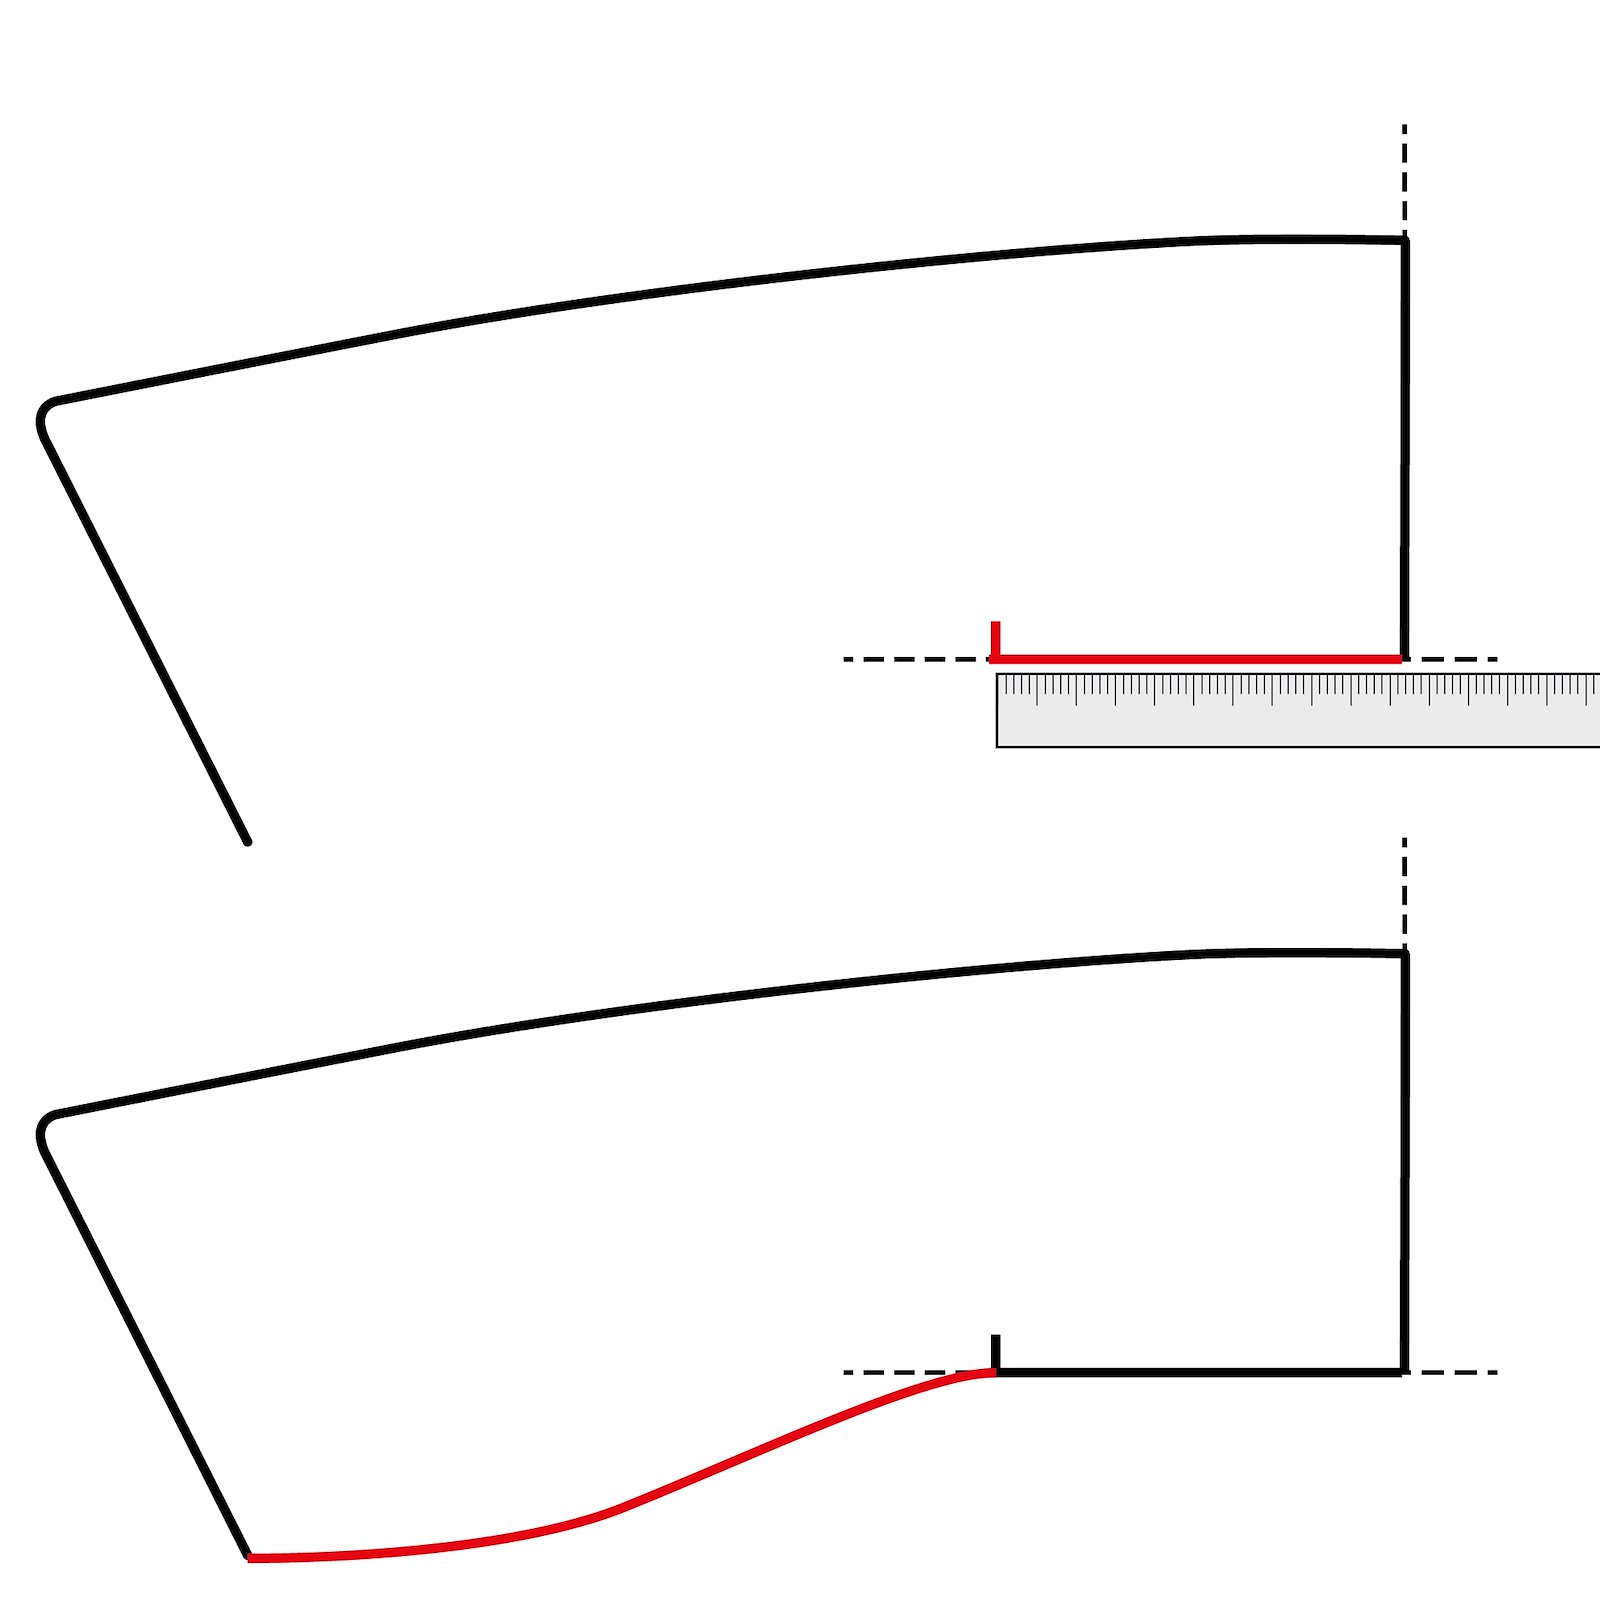
4.4A. Measure from the neck seam of the collar on the back, in this example . 8 cm, on the horizontal line and draw a notch = location at shoulder seam. 4B. Draw the neck seam of the collar on the front piece in a slight curve, looking at the shape of your jacket collar. 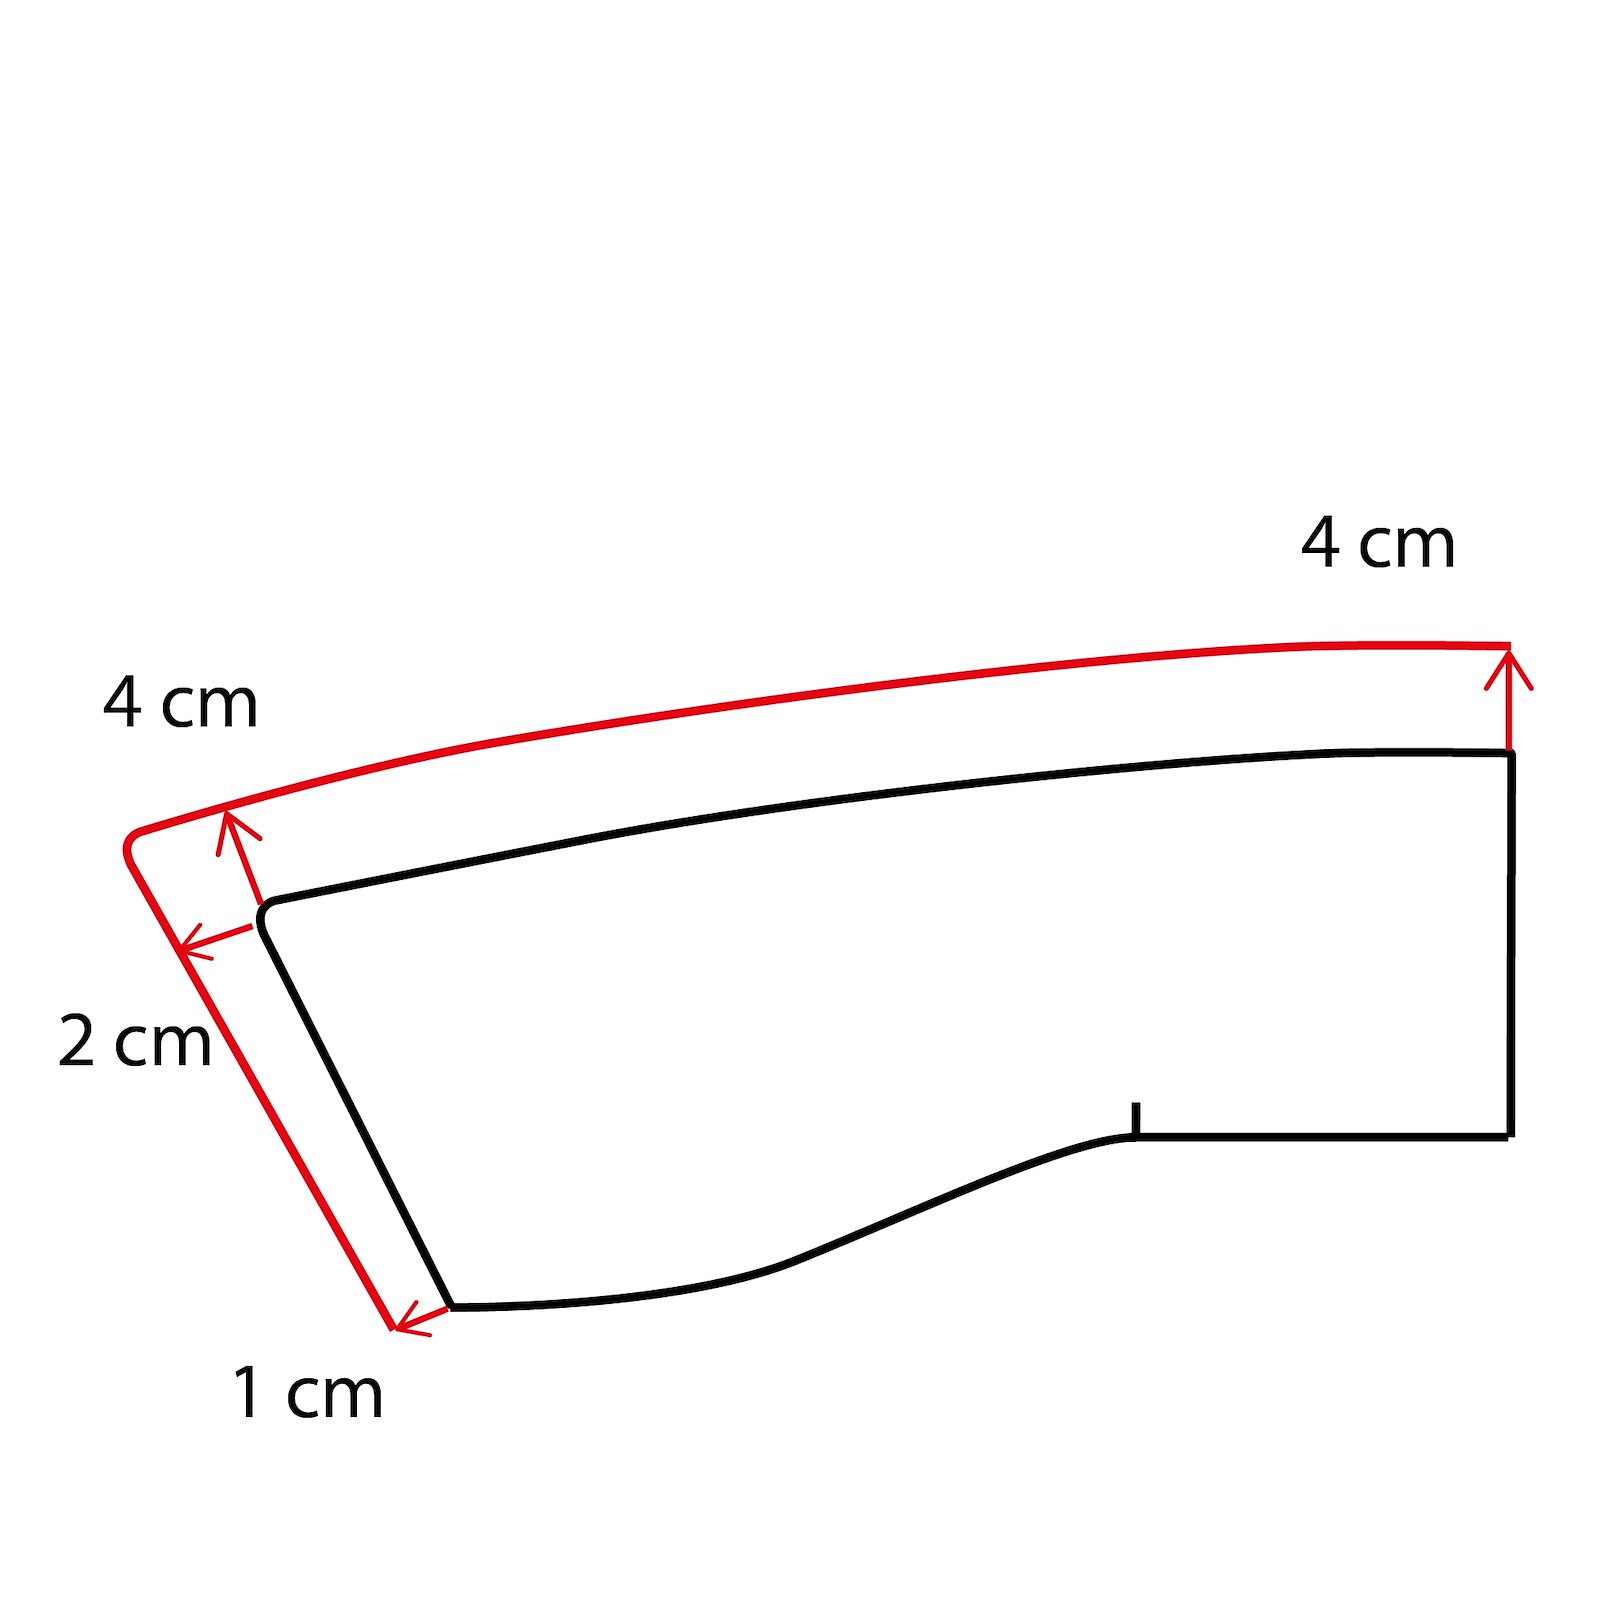
5.Draw the pattern larger. 1 cm at the collar neck seam, 2 cm and 4 cm at the collar tip, and 4 cm at the center back collar. 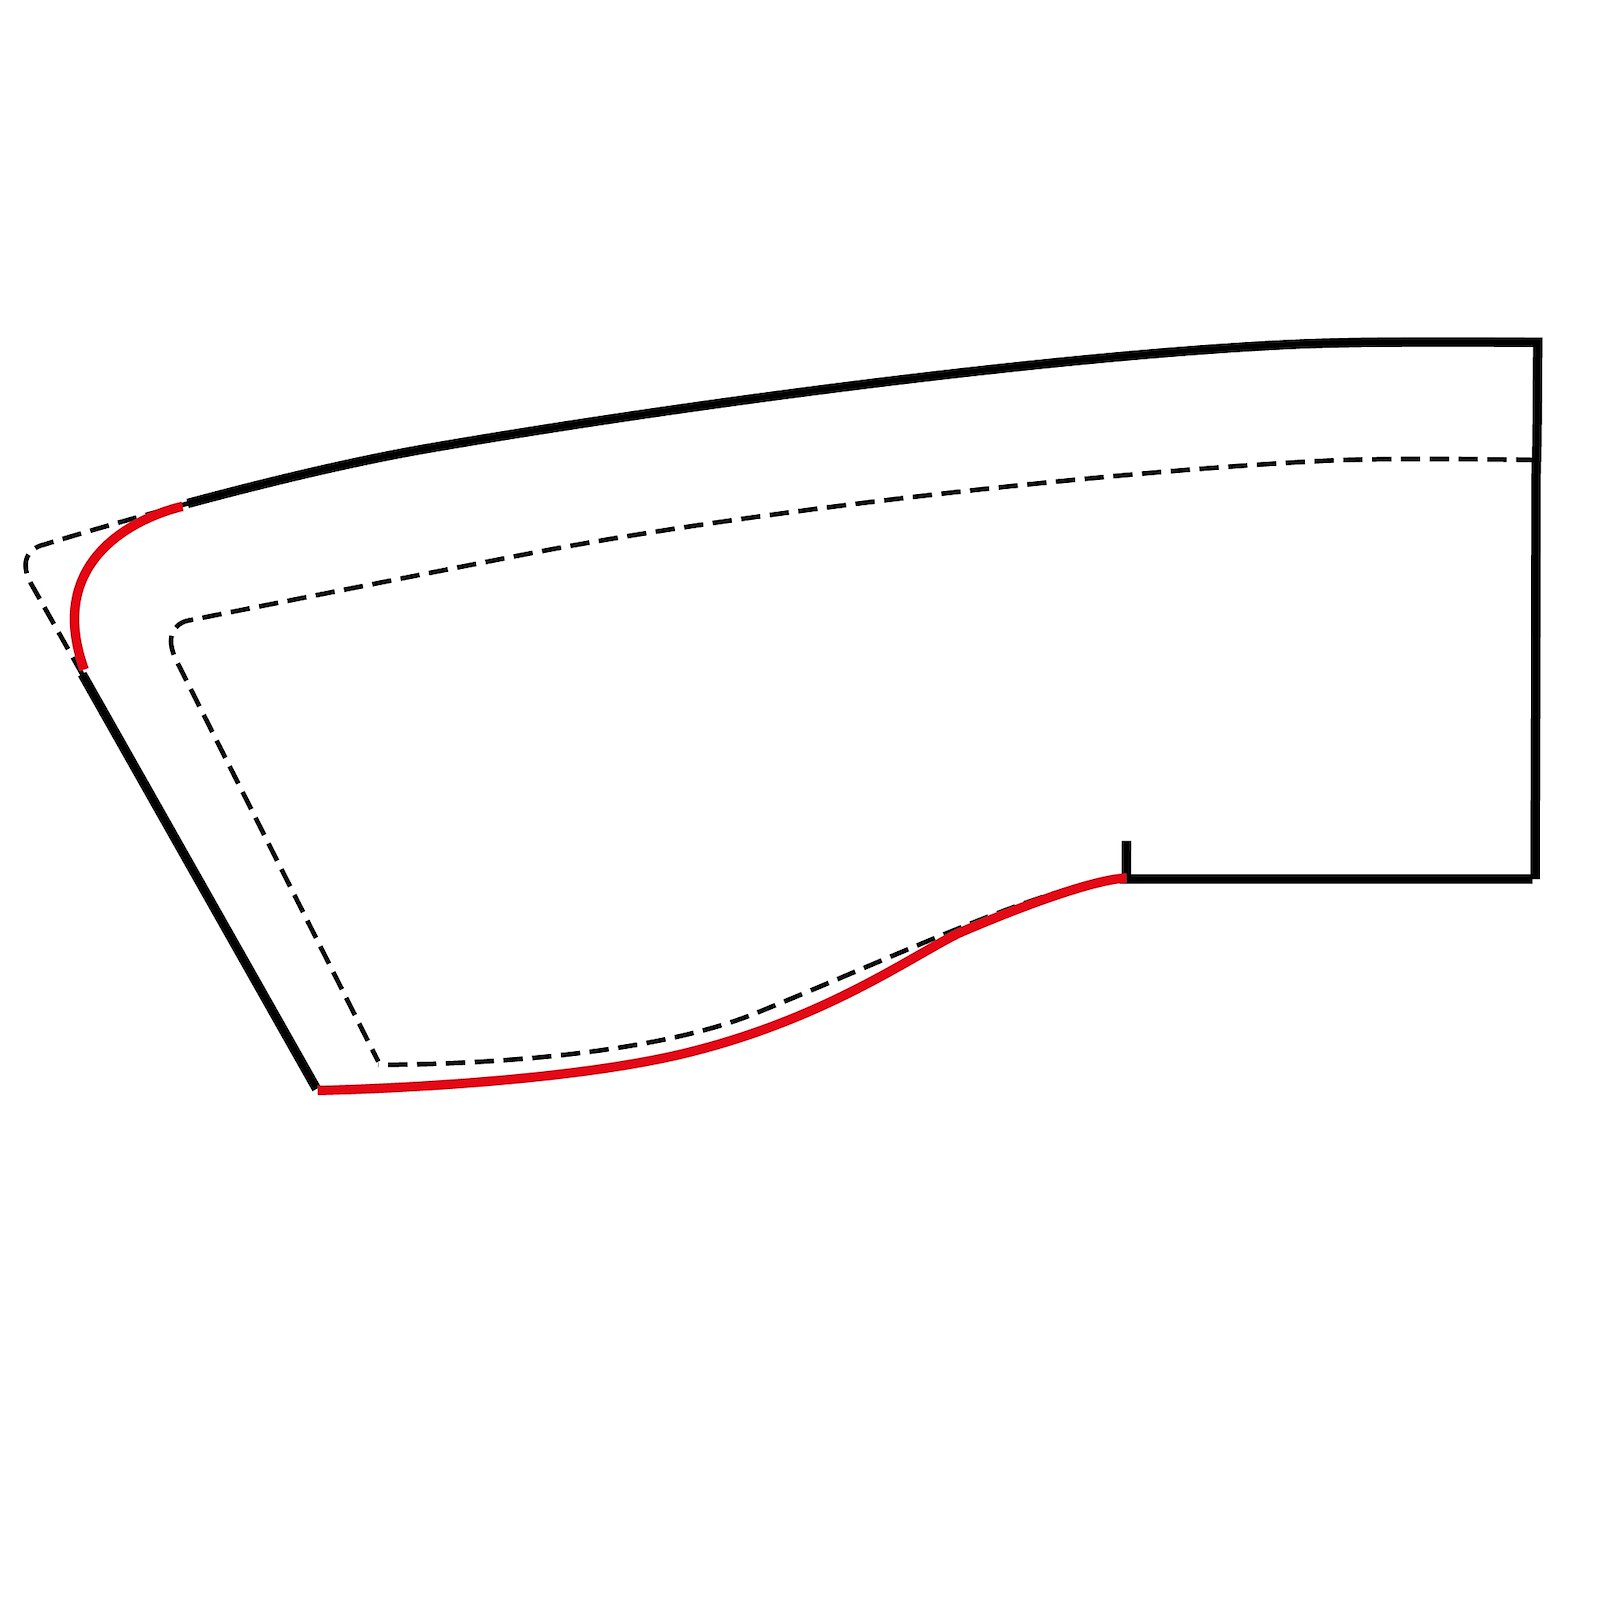
6.Round off the collar tip. and draw a new neck seam. 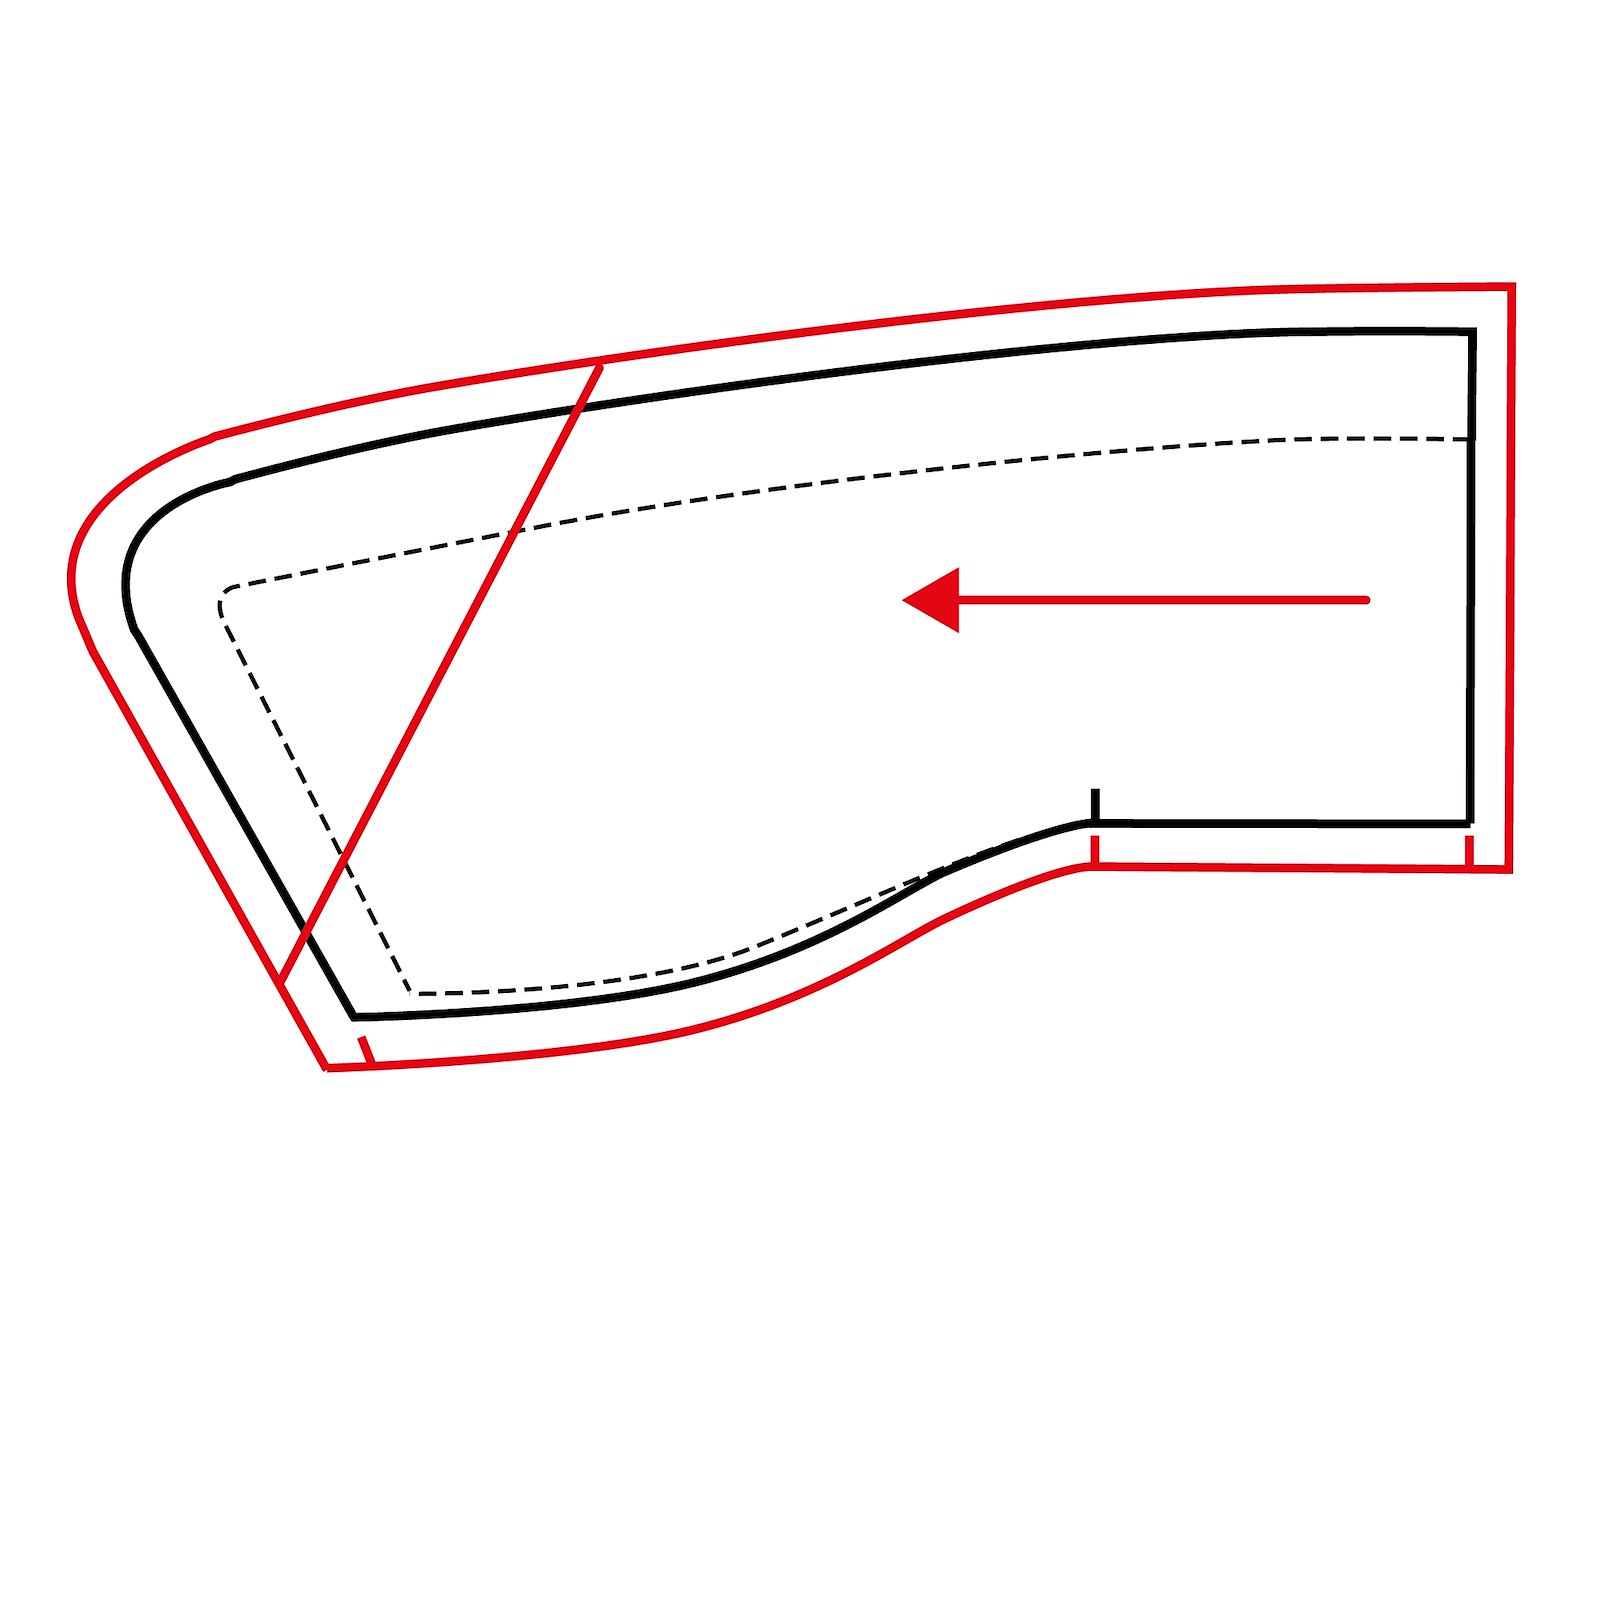
7.Draw 1 cm seam allowance all the way around the pattern. Draw the direction arrow perpendicular to the center back. Draw notches on the collar neck seam at center back, shoulder and front. Draw a slanted line that goes over the original collar tip. 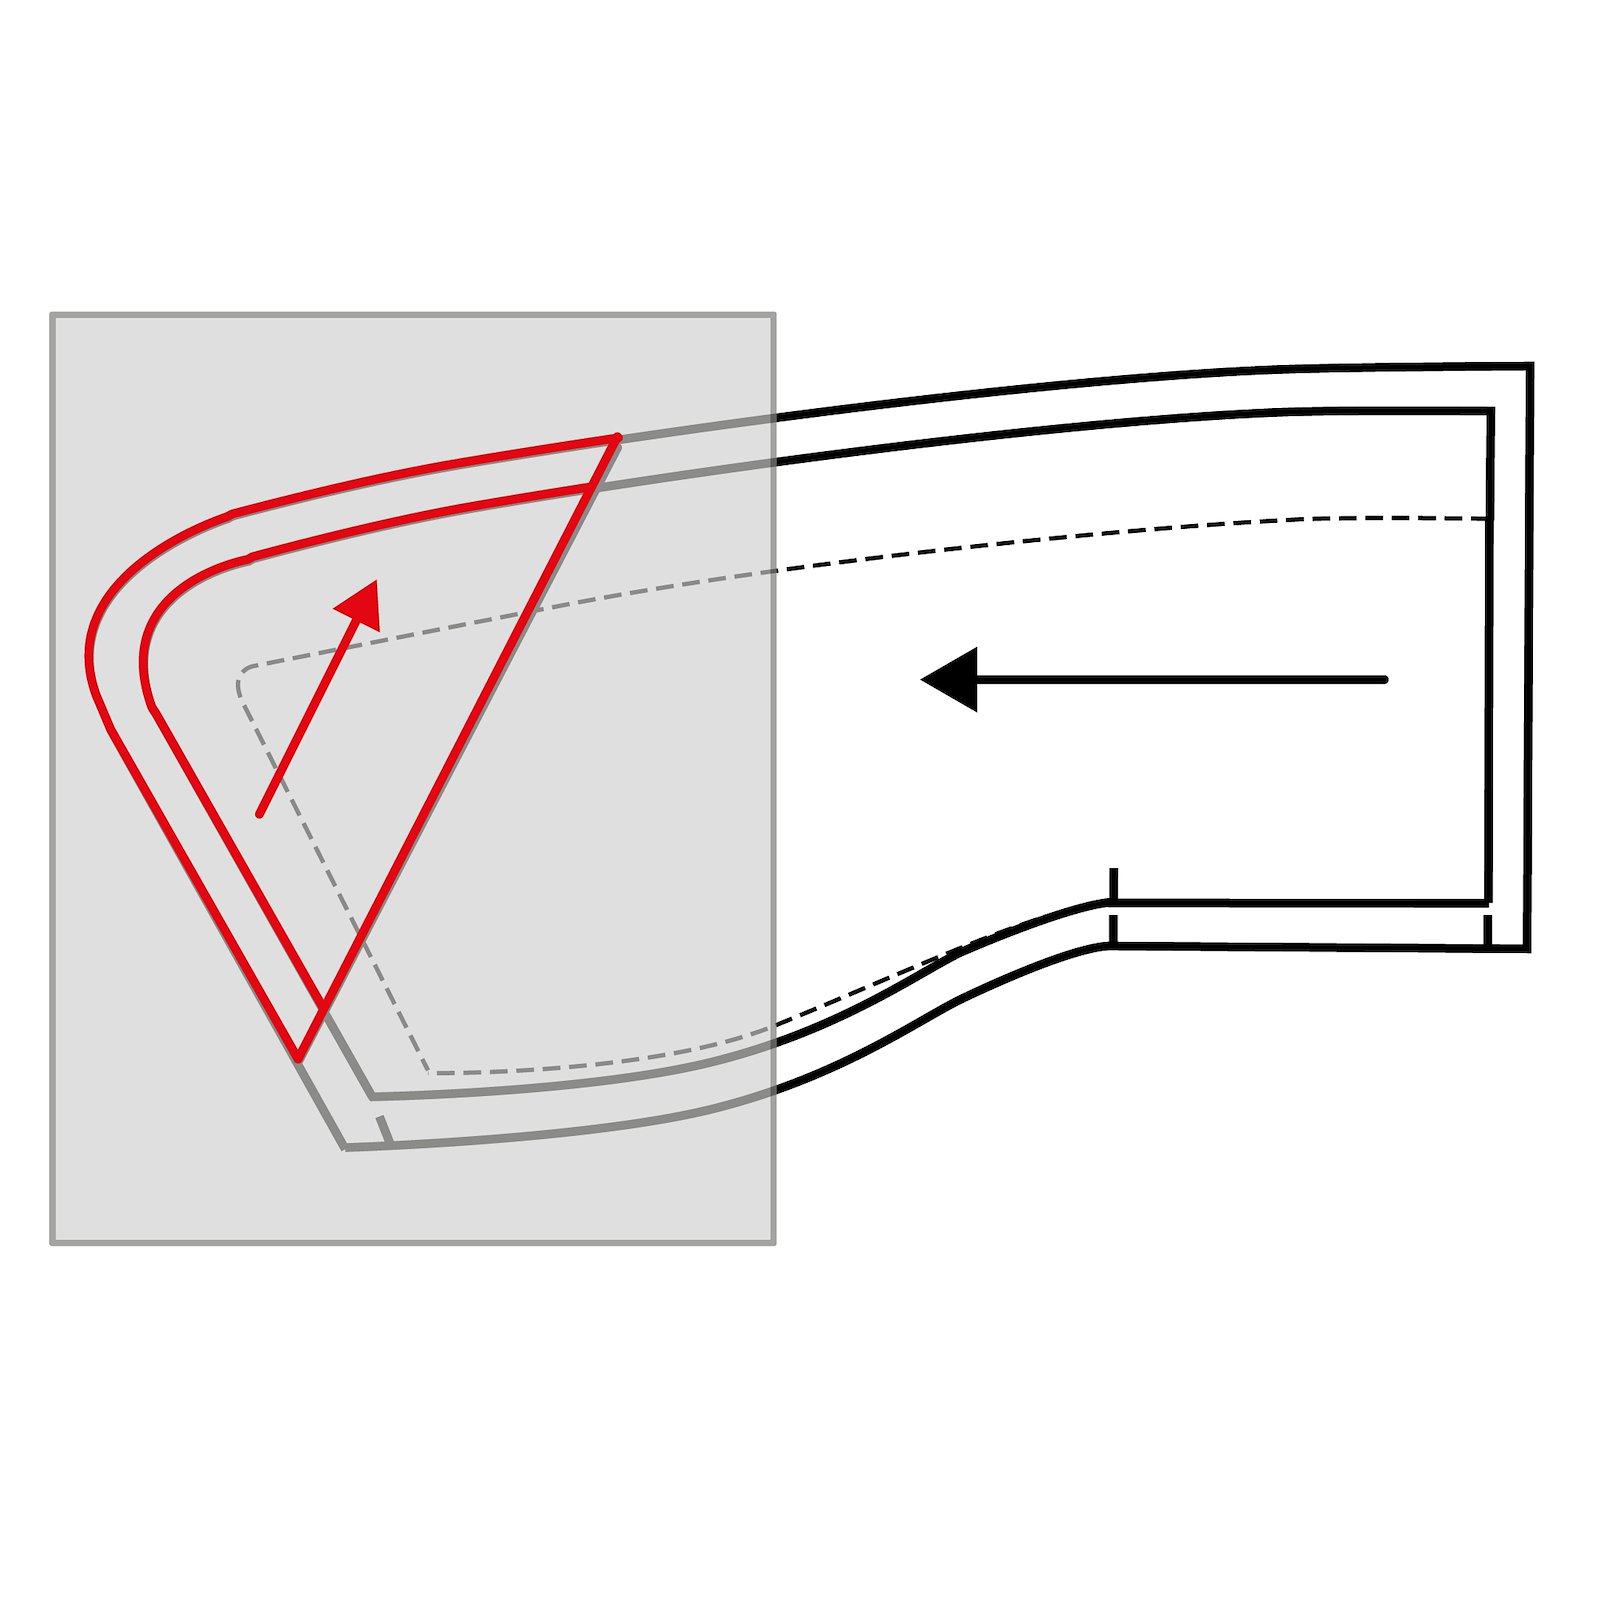
8.Trace the new pattern piece to the collar tip on pattern paper. Draw the direction line parallel to the slanted line. 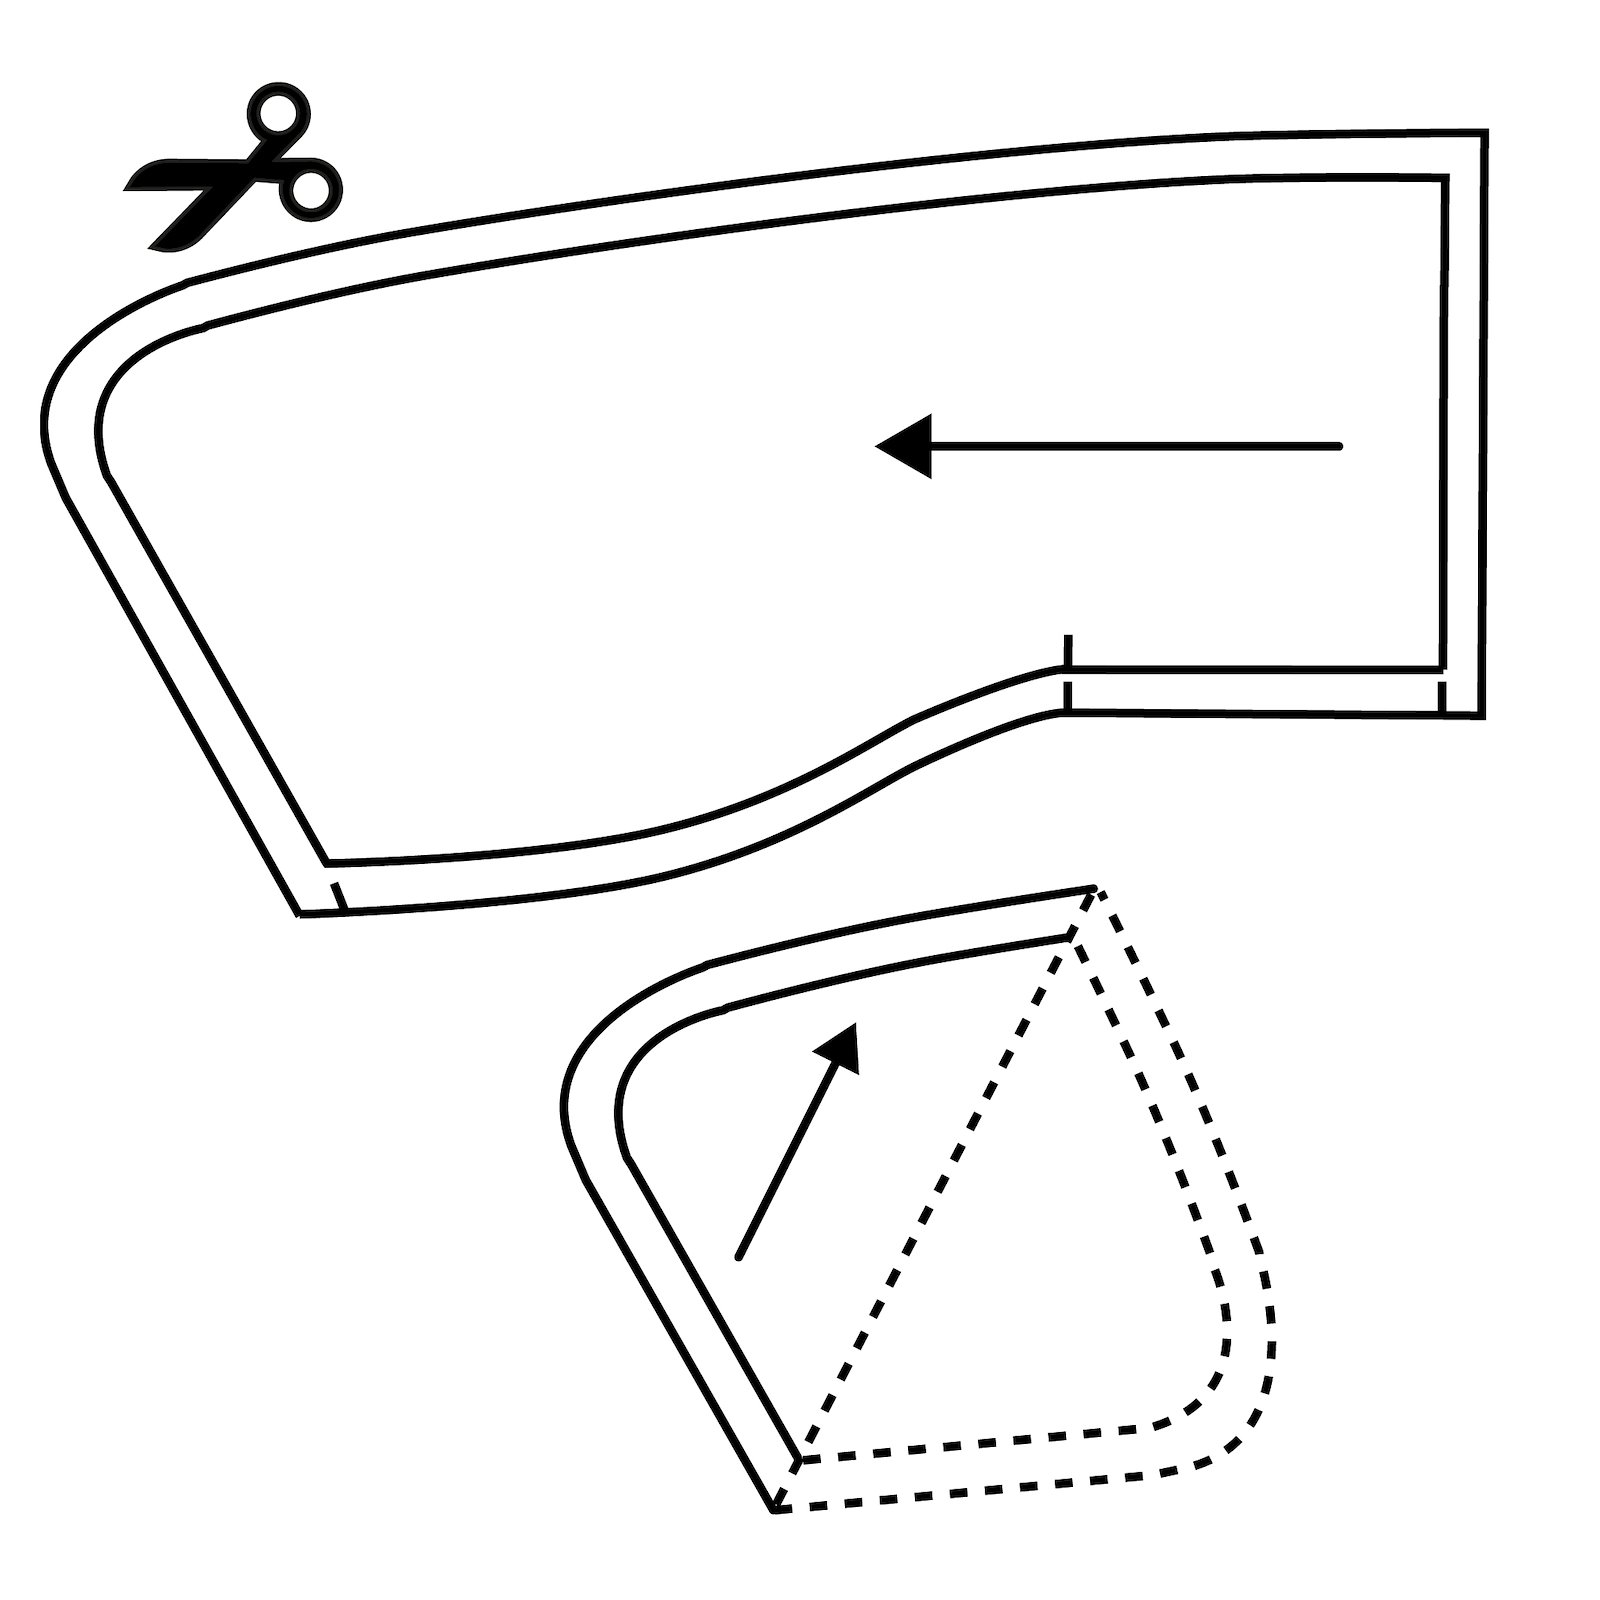
9.Mirror pattern piece for collar tip around fold line and cut out. 10.For sewing the collar and construction and sewing the fur collar for jacket with lapels download our free DIY


