DIY1026 Embroidery Flowers Steps6

Embroidery guide: the most important stitches and techniques

Would you like to start embroidering? We fully understand!


Embroidery is a tradition that goes back thousands of years, and you can use it to decorate everything between heaven and earth. You can embroider clothes, tablecloths, bedspreads and cushions - and create stunning images with motifs and quotes.


Embroidery as upcycling

As well as creating personalised works of art, embroidery is also a great technique for repairing small holes or simply giving new life to your old clothes and home decor. And who doesn't love to upcycle rather than throw away?


In fact, the only limit to what you can do with embroidery is your imagination. And luckily, it's easy to get started.

DIY1037 Image

A quick-guide suitable for beginners and experienced

We've put together everything you need to know to get started with embroidery in this guide.


At the same time, the guide serves as a reference for you to check out different stitches and techniques when you need to.


Are you ready? Then let’s get started!

You can embroider on many different materials, and the choice depends on the embroidery technique you wish to use.


Below you can read both how to embroider directly on a project with water-soluble interlining and how to embroider on embroidery fabric (Aida fabric).

If you want to embroider a design directly onto a sweater, T-shirt, denim jacket or other similar project, we recommend using water-soluble interlining. It's like magic!


How to use water soluble interlining for embroidery:


Draw up your motif

You place your template or freehand drawing under the water-soluble fleece and draw the motif with the water-soluble marker pen. By using the interlining, you avoid having to draw on the fabric itself.


Our water-soluble marker pen has an extra-fine tip and is perfect for markings. If the line disappears, simply draw it back in.


NOTE: Our pen is blue and therefore may be harder to see on blue/darker fabrics.


Rinse the embroidery in cold water

When you have finished embroidering, rinse the embroidery in cold water. Now the marking line and the water-soluble interlining will disappear.


Naturally, you also have the option to draw directly on your project and start embroidering. But we recommend the water-soluble interlining as it makes it easier to keep track of the embroidery - especially for beginners.


Plus, if you make a small mistake, you don't have to throw away your entire outfit. A win-win, if you ask us.


Diy1037 Step By Step

You've probably seen embroidery fabric before. It is the type of fabric most often embroidered with cross-stitch. The fabric, also called cross-stitch fabric, is made of cotton and has distinct squares, making it particularly easy to embroider on. The size is given in stitches per cm - the lower the number, the larger the squares and the easier they are to embroider.


With this type of fabric and embroidery, you can create fine pictures for framing; make projects a la tote bags, decorative cushions - and much more. You also have the option of using fabric types such as straw, linen, canvas and hardanger embroidery fabric.


How to use Aida embroidery fabric:

When embroidering on Aida embroidery fabric, you often follow a pattern displaying how to embroider the design.


Make sure the fabric size matches the chart so you don't run out of room along the way. You can do this easily by counting the squares on your pattern so you know how much you need in height and width for your design.


When working with cross-stitch, it is best to start from the centre of the embroidery fabric to ensure that the design is centred. Count the number of squares in the Aida fabric (or fold the fabric in both directions) and mark the centre. The center of the fabric will correspond to the center of your pattern.

MG 6742 1

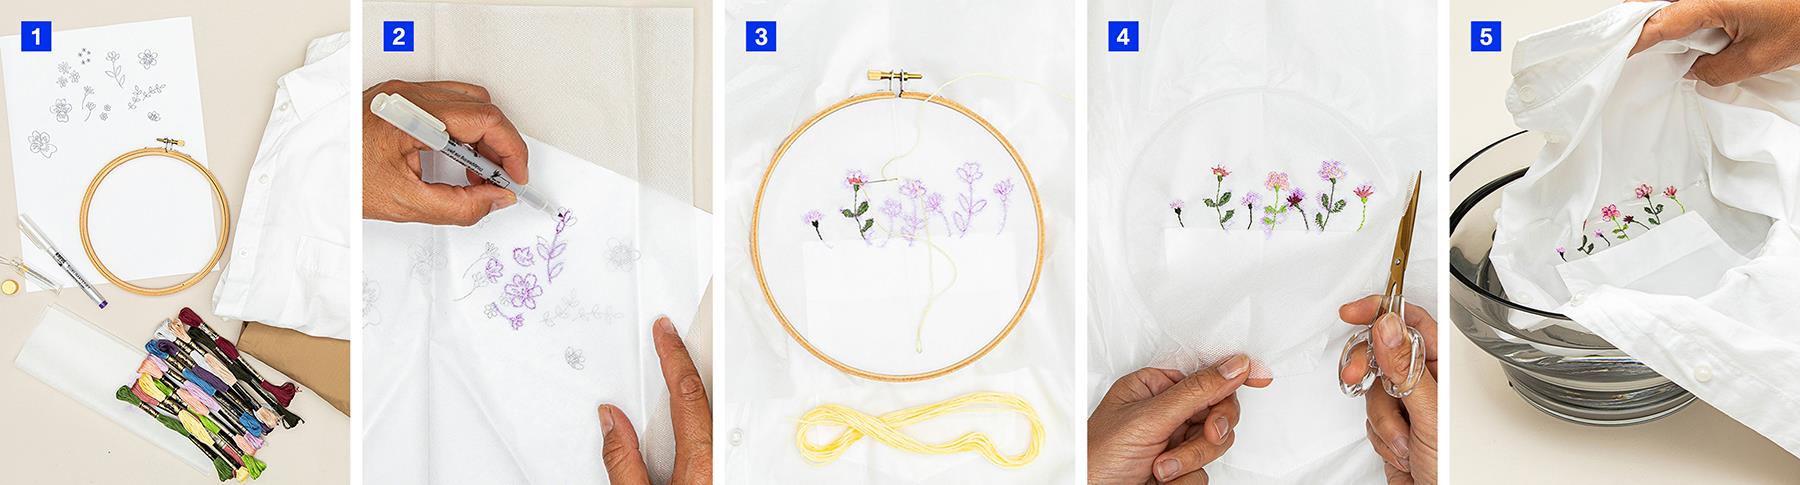
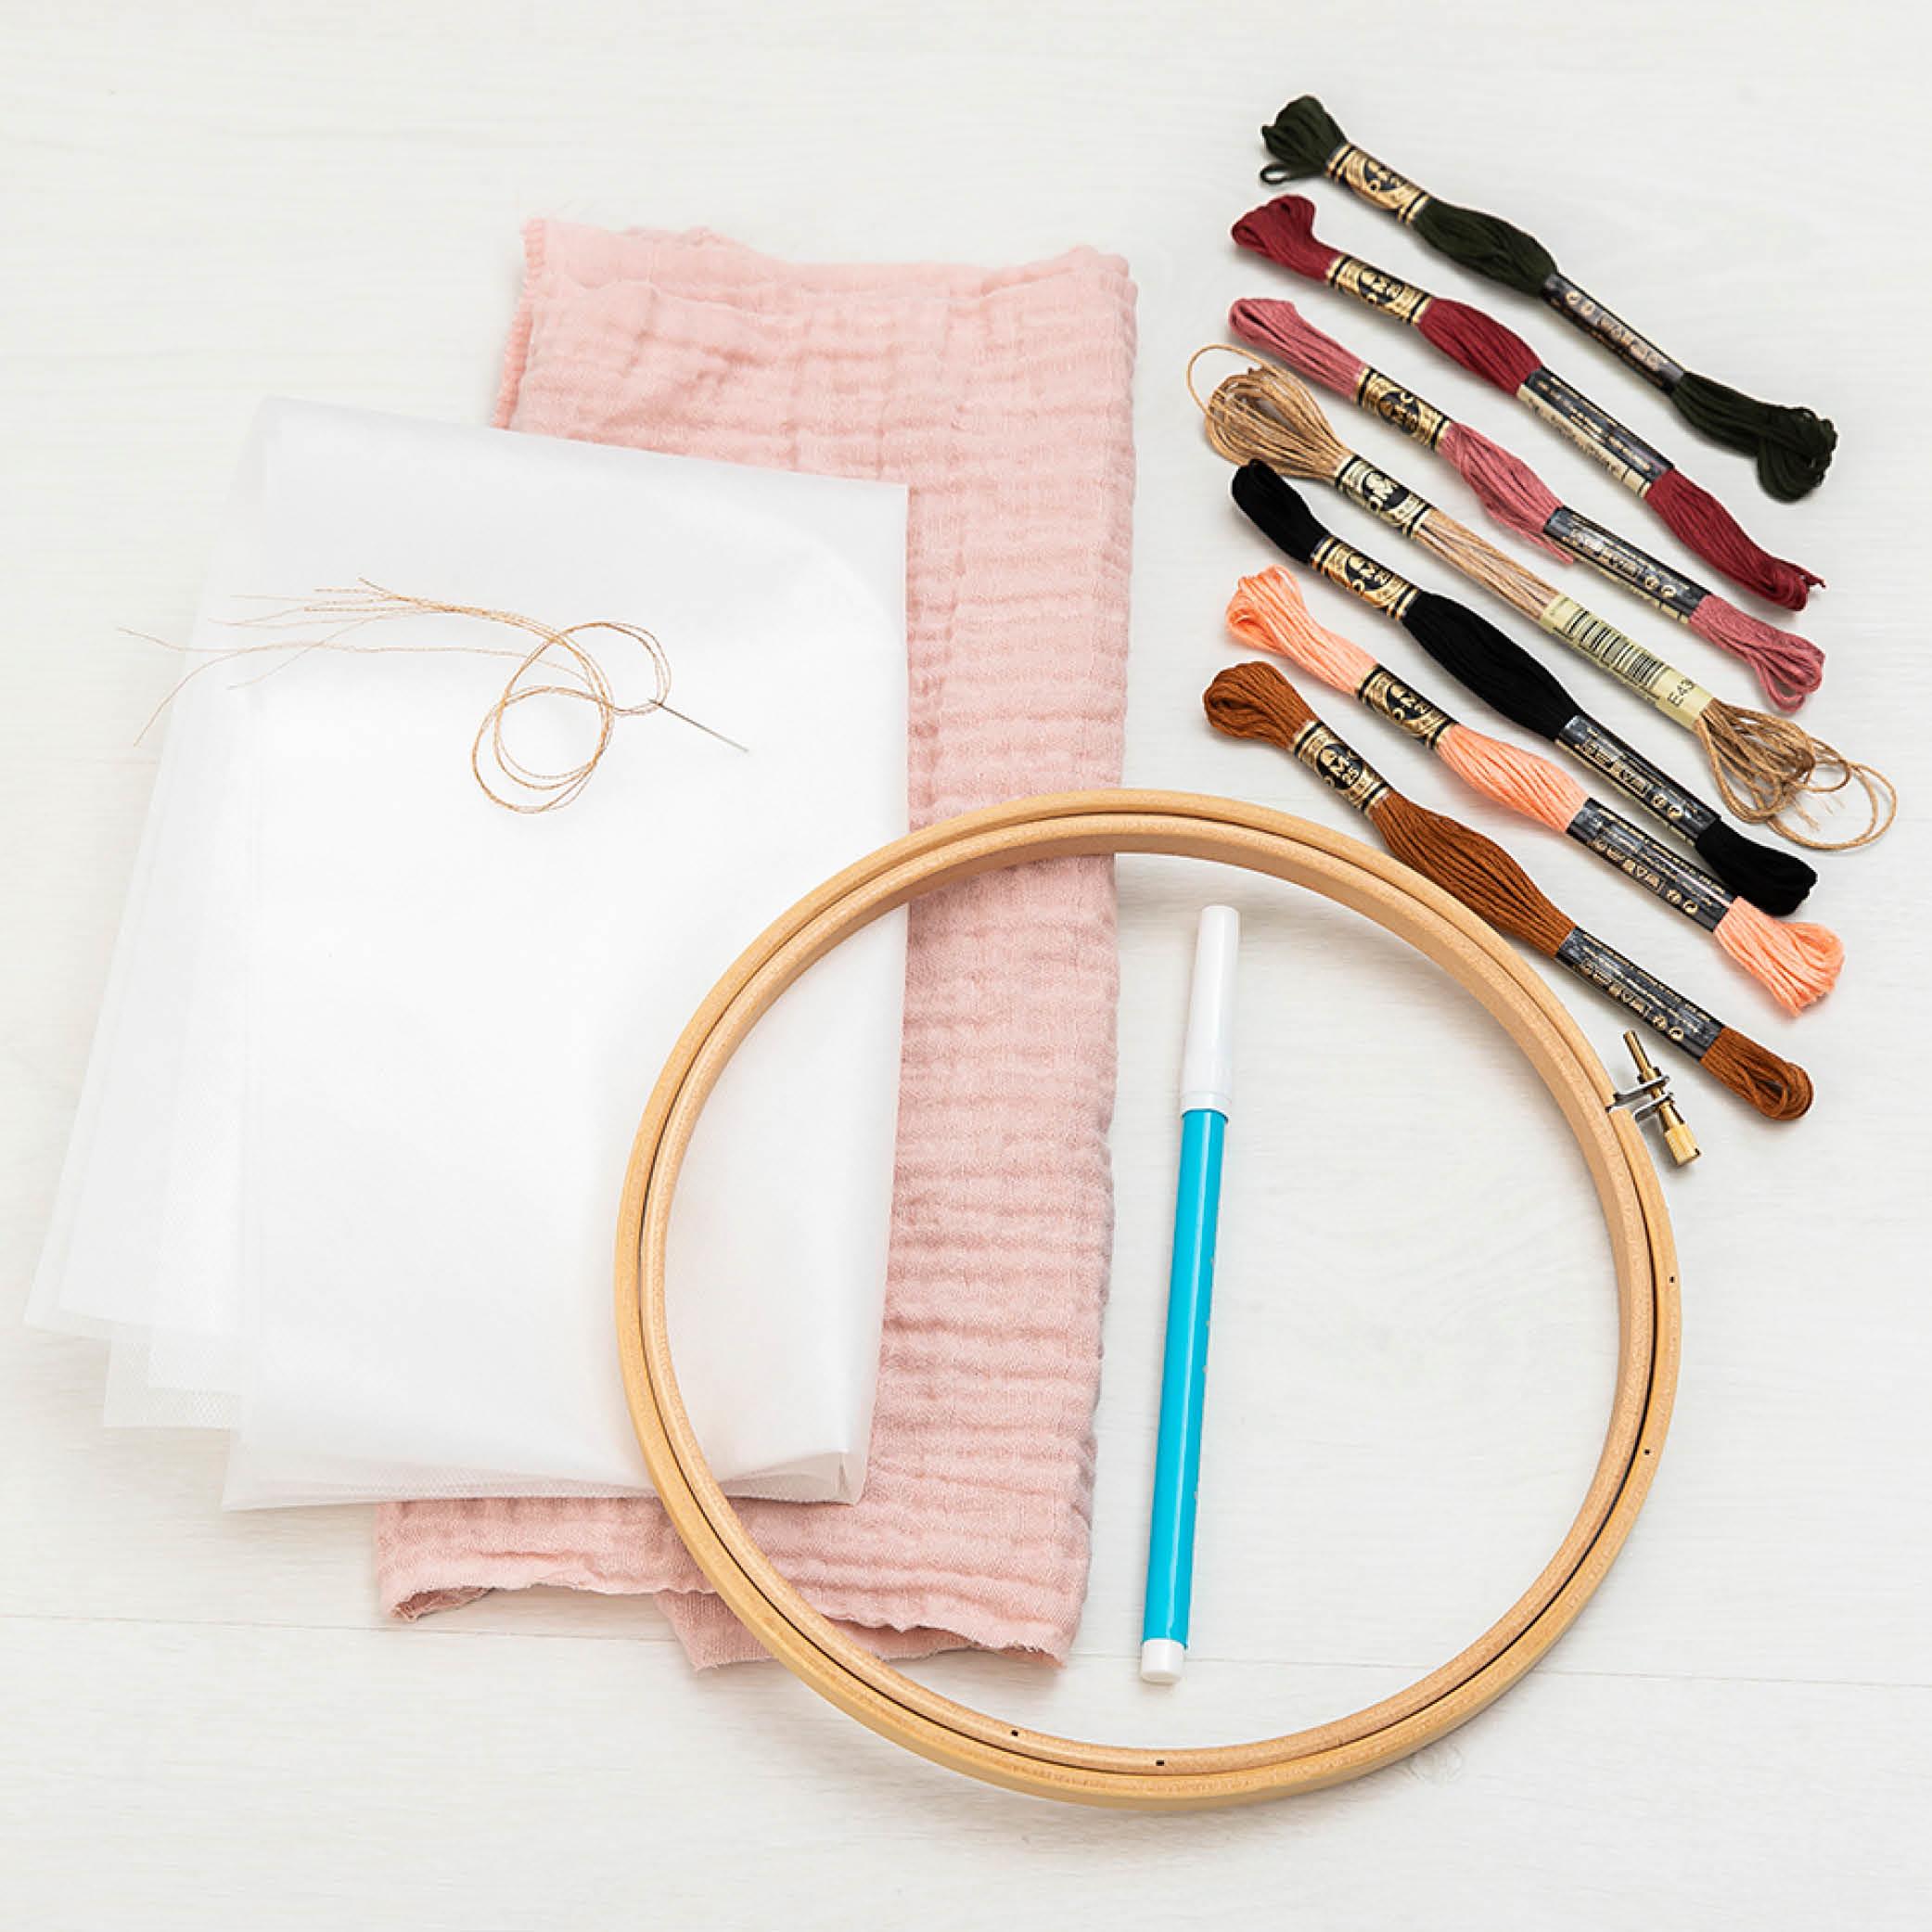
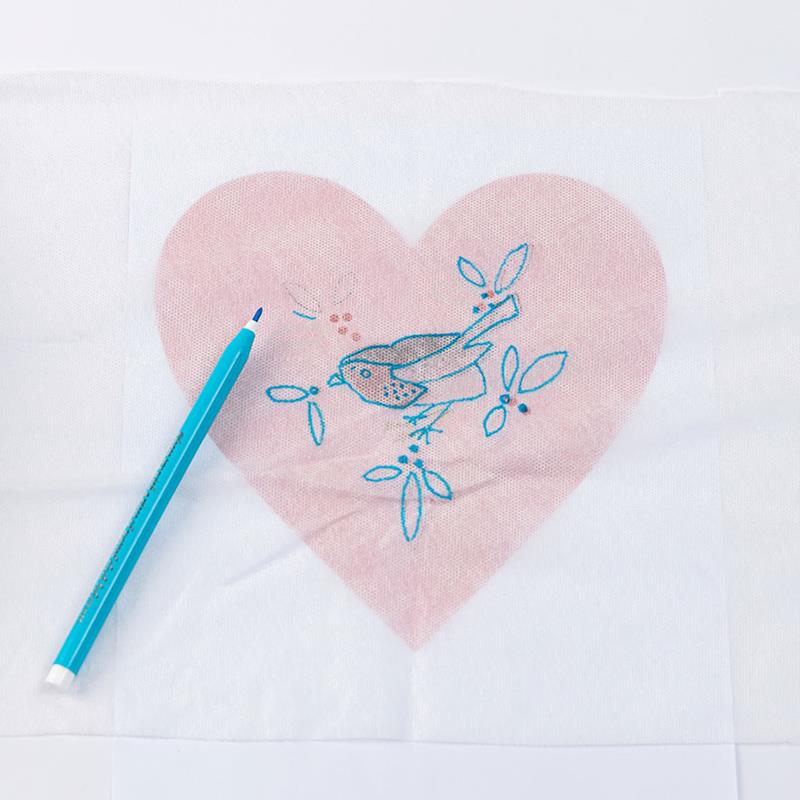
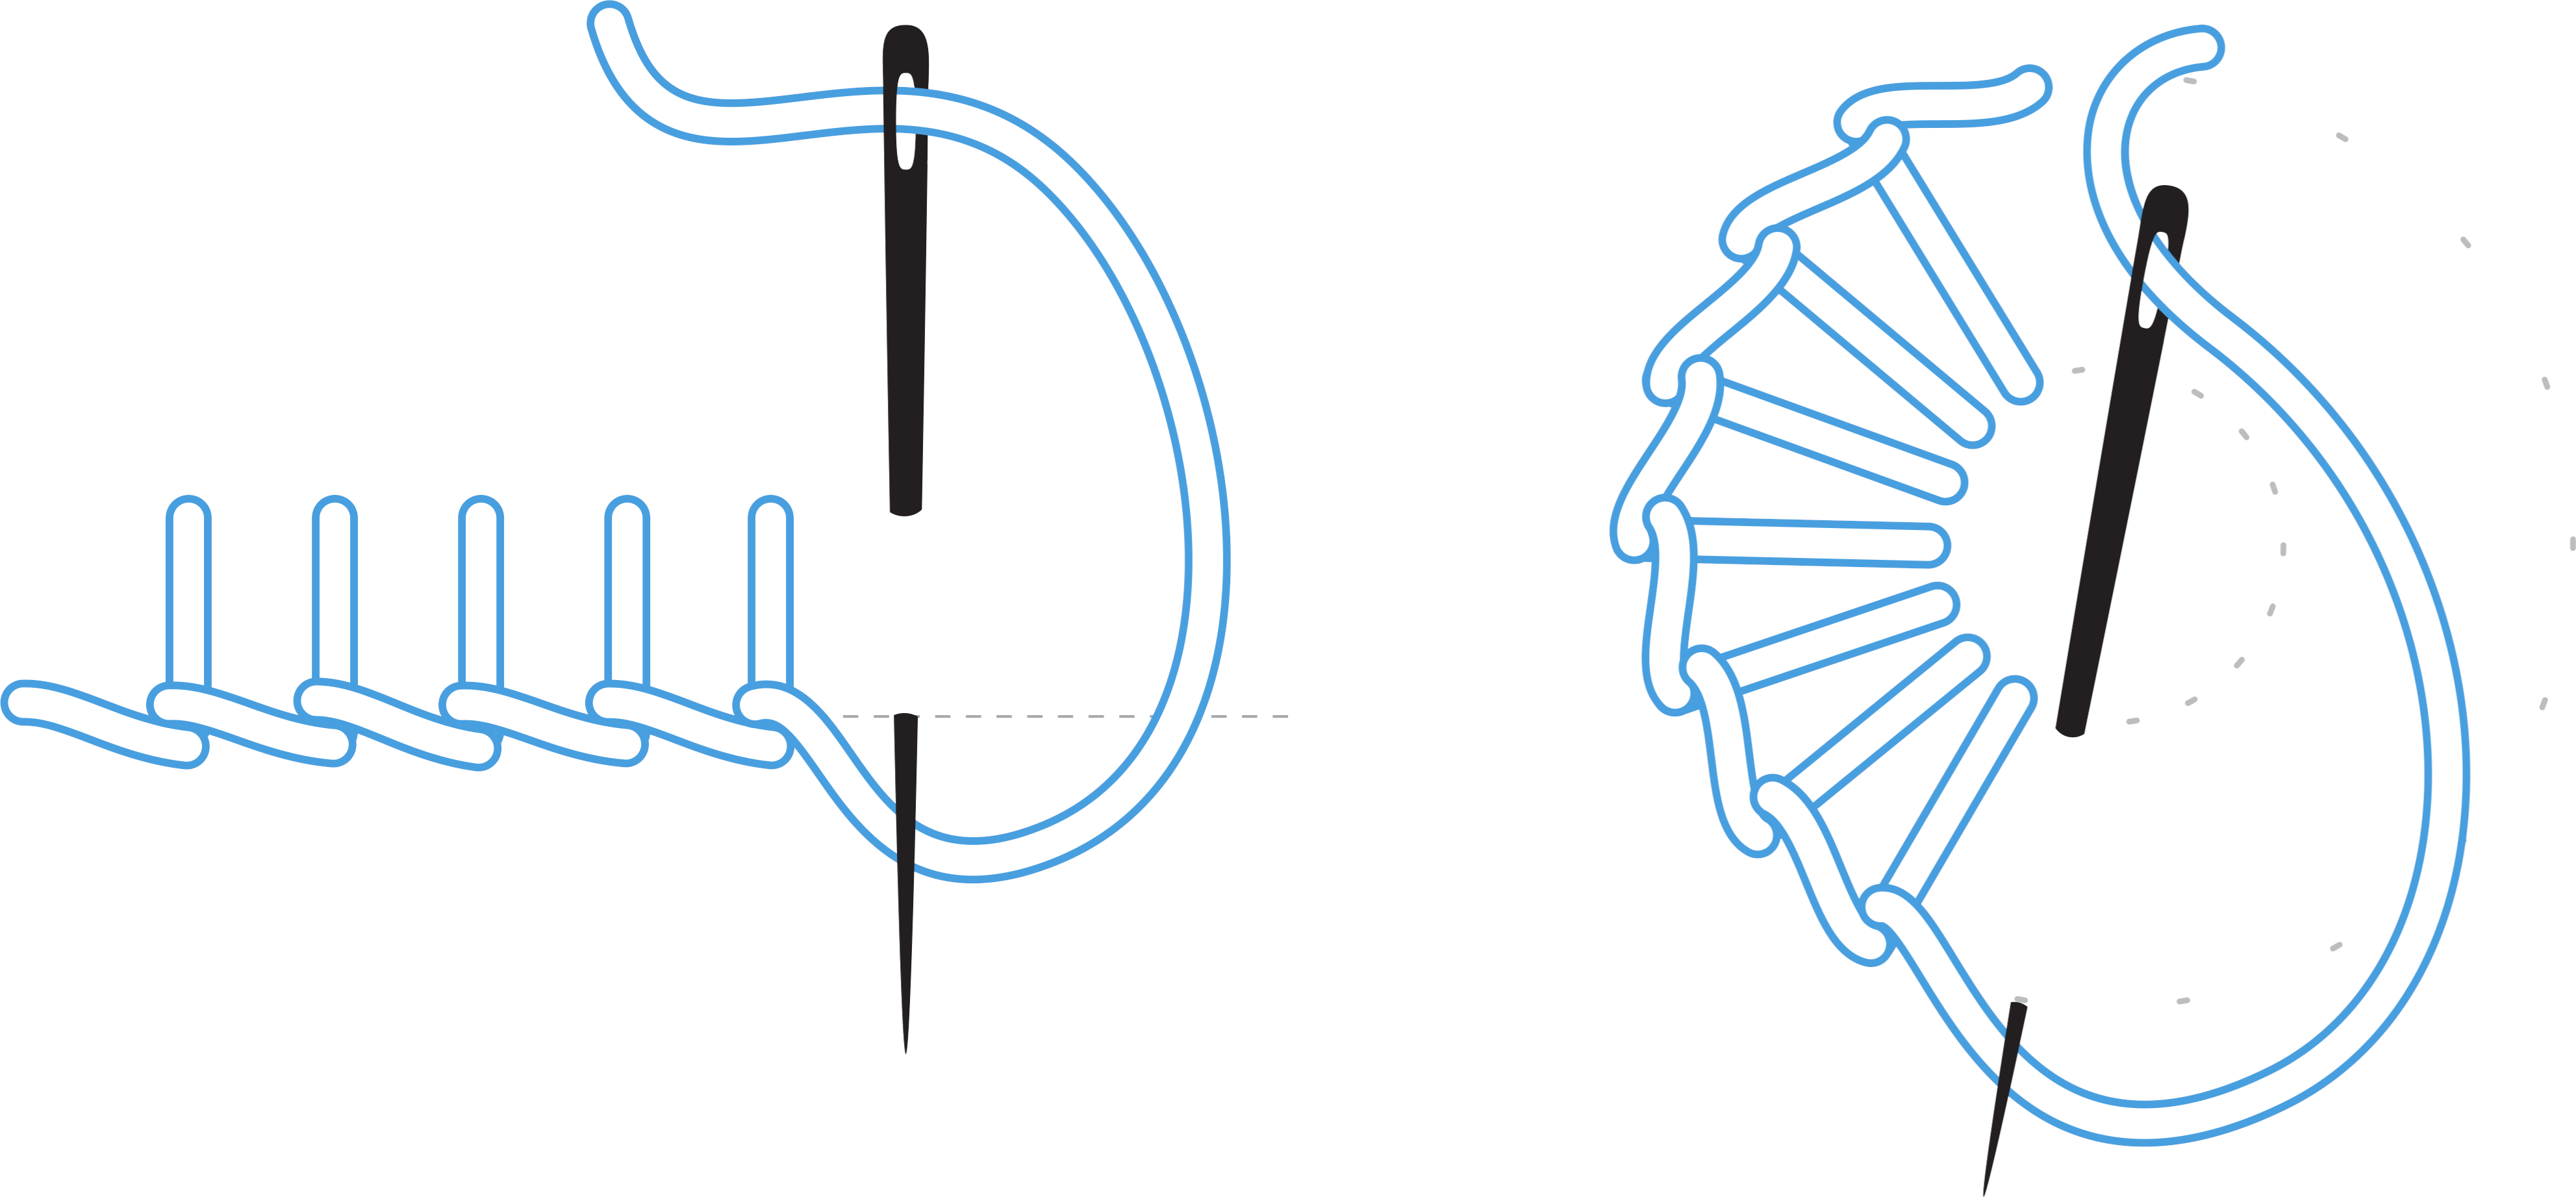
#1 Attach your fabric to an embroidery hoop

By attaching your fabric/fleece to an embroidery hoop, you keep the fabric free of creases when embroidering. At the same time, it ensures that you embroider neither too tightly nor too loosely.


Tip: Tighten the fabric once in a while. If you are making large embroidery on water-soluble fleece, you may want to thread the fleece to your fabric to keep it in place. You'll have to move the embroidery as you go.


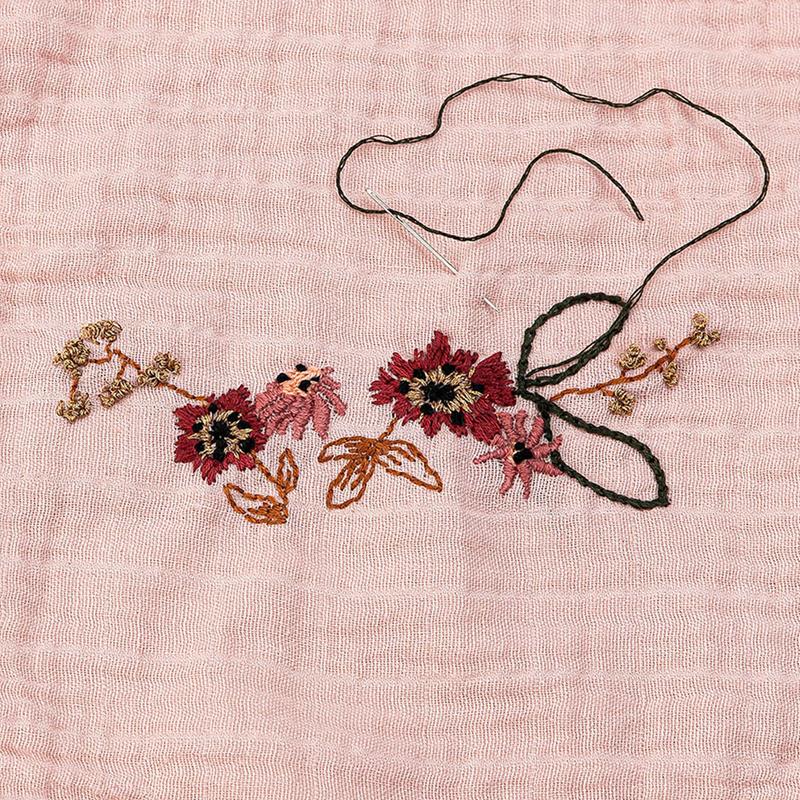
Keep your template, freehand drawing or pattern next to you when embroidering as an extra guide.


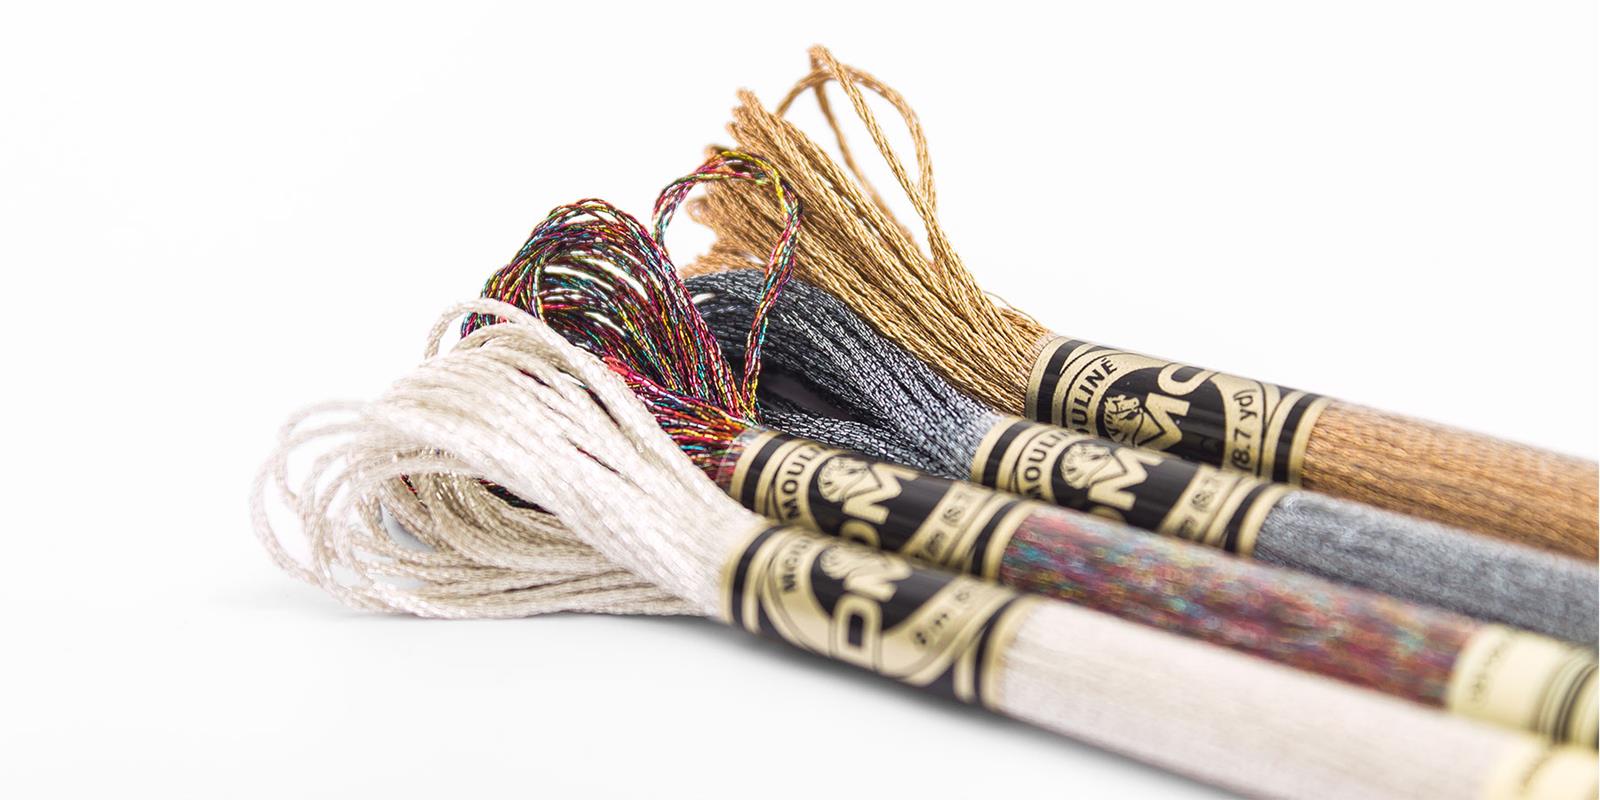
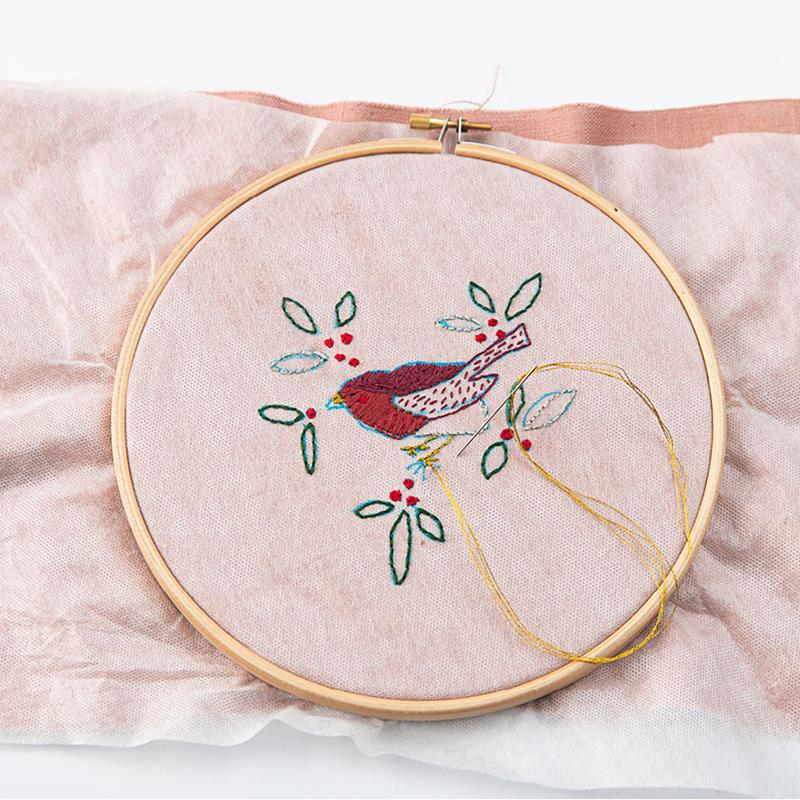
#2 Split your embroidery thread

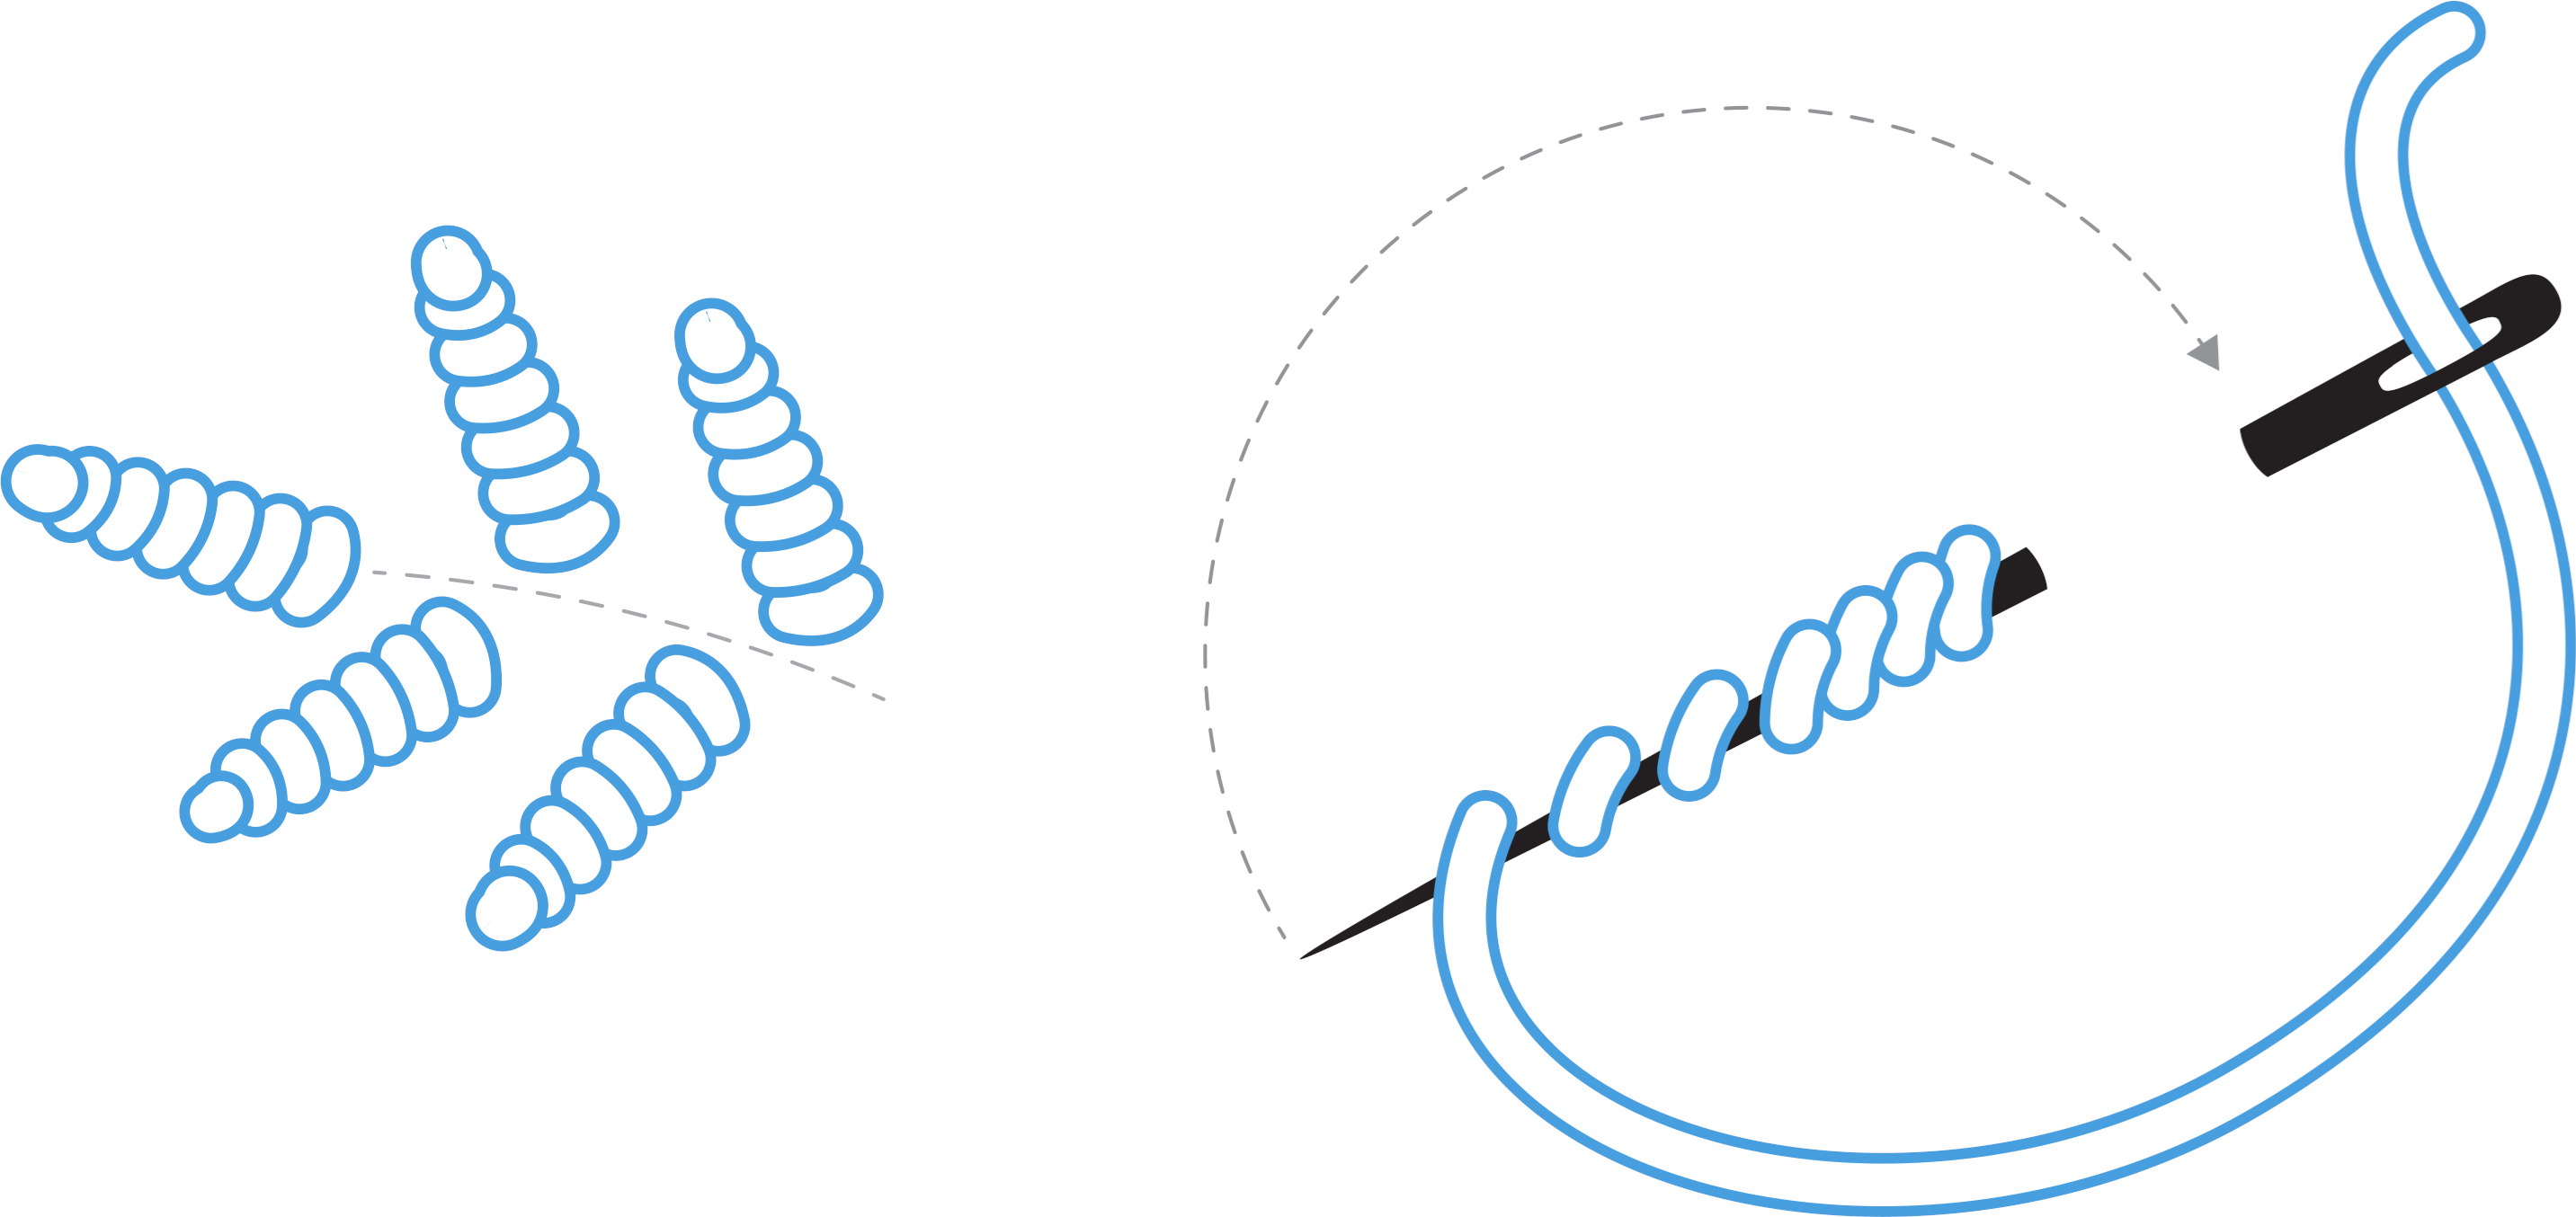
Our embroidery thread has six strands. But you don't typically need all of them - just the number described in the pattern you're using.


For cross stitch, for example, you often use only two threads, as you need to thread the thread through small holes. If you embroider freehand, you can basically decide how many threads you want to use - depending on how fine or coarse you want the embroidery.


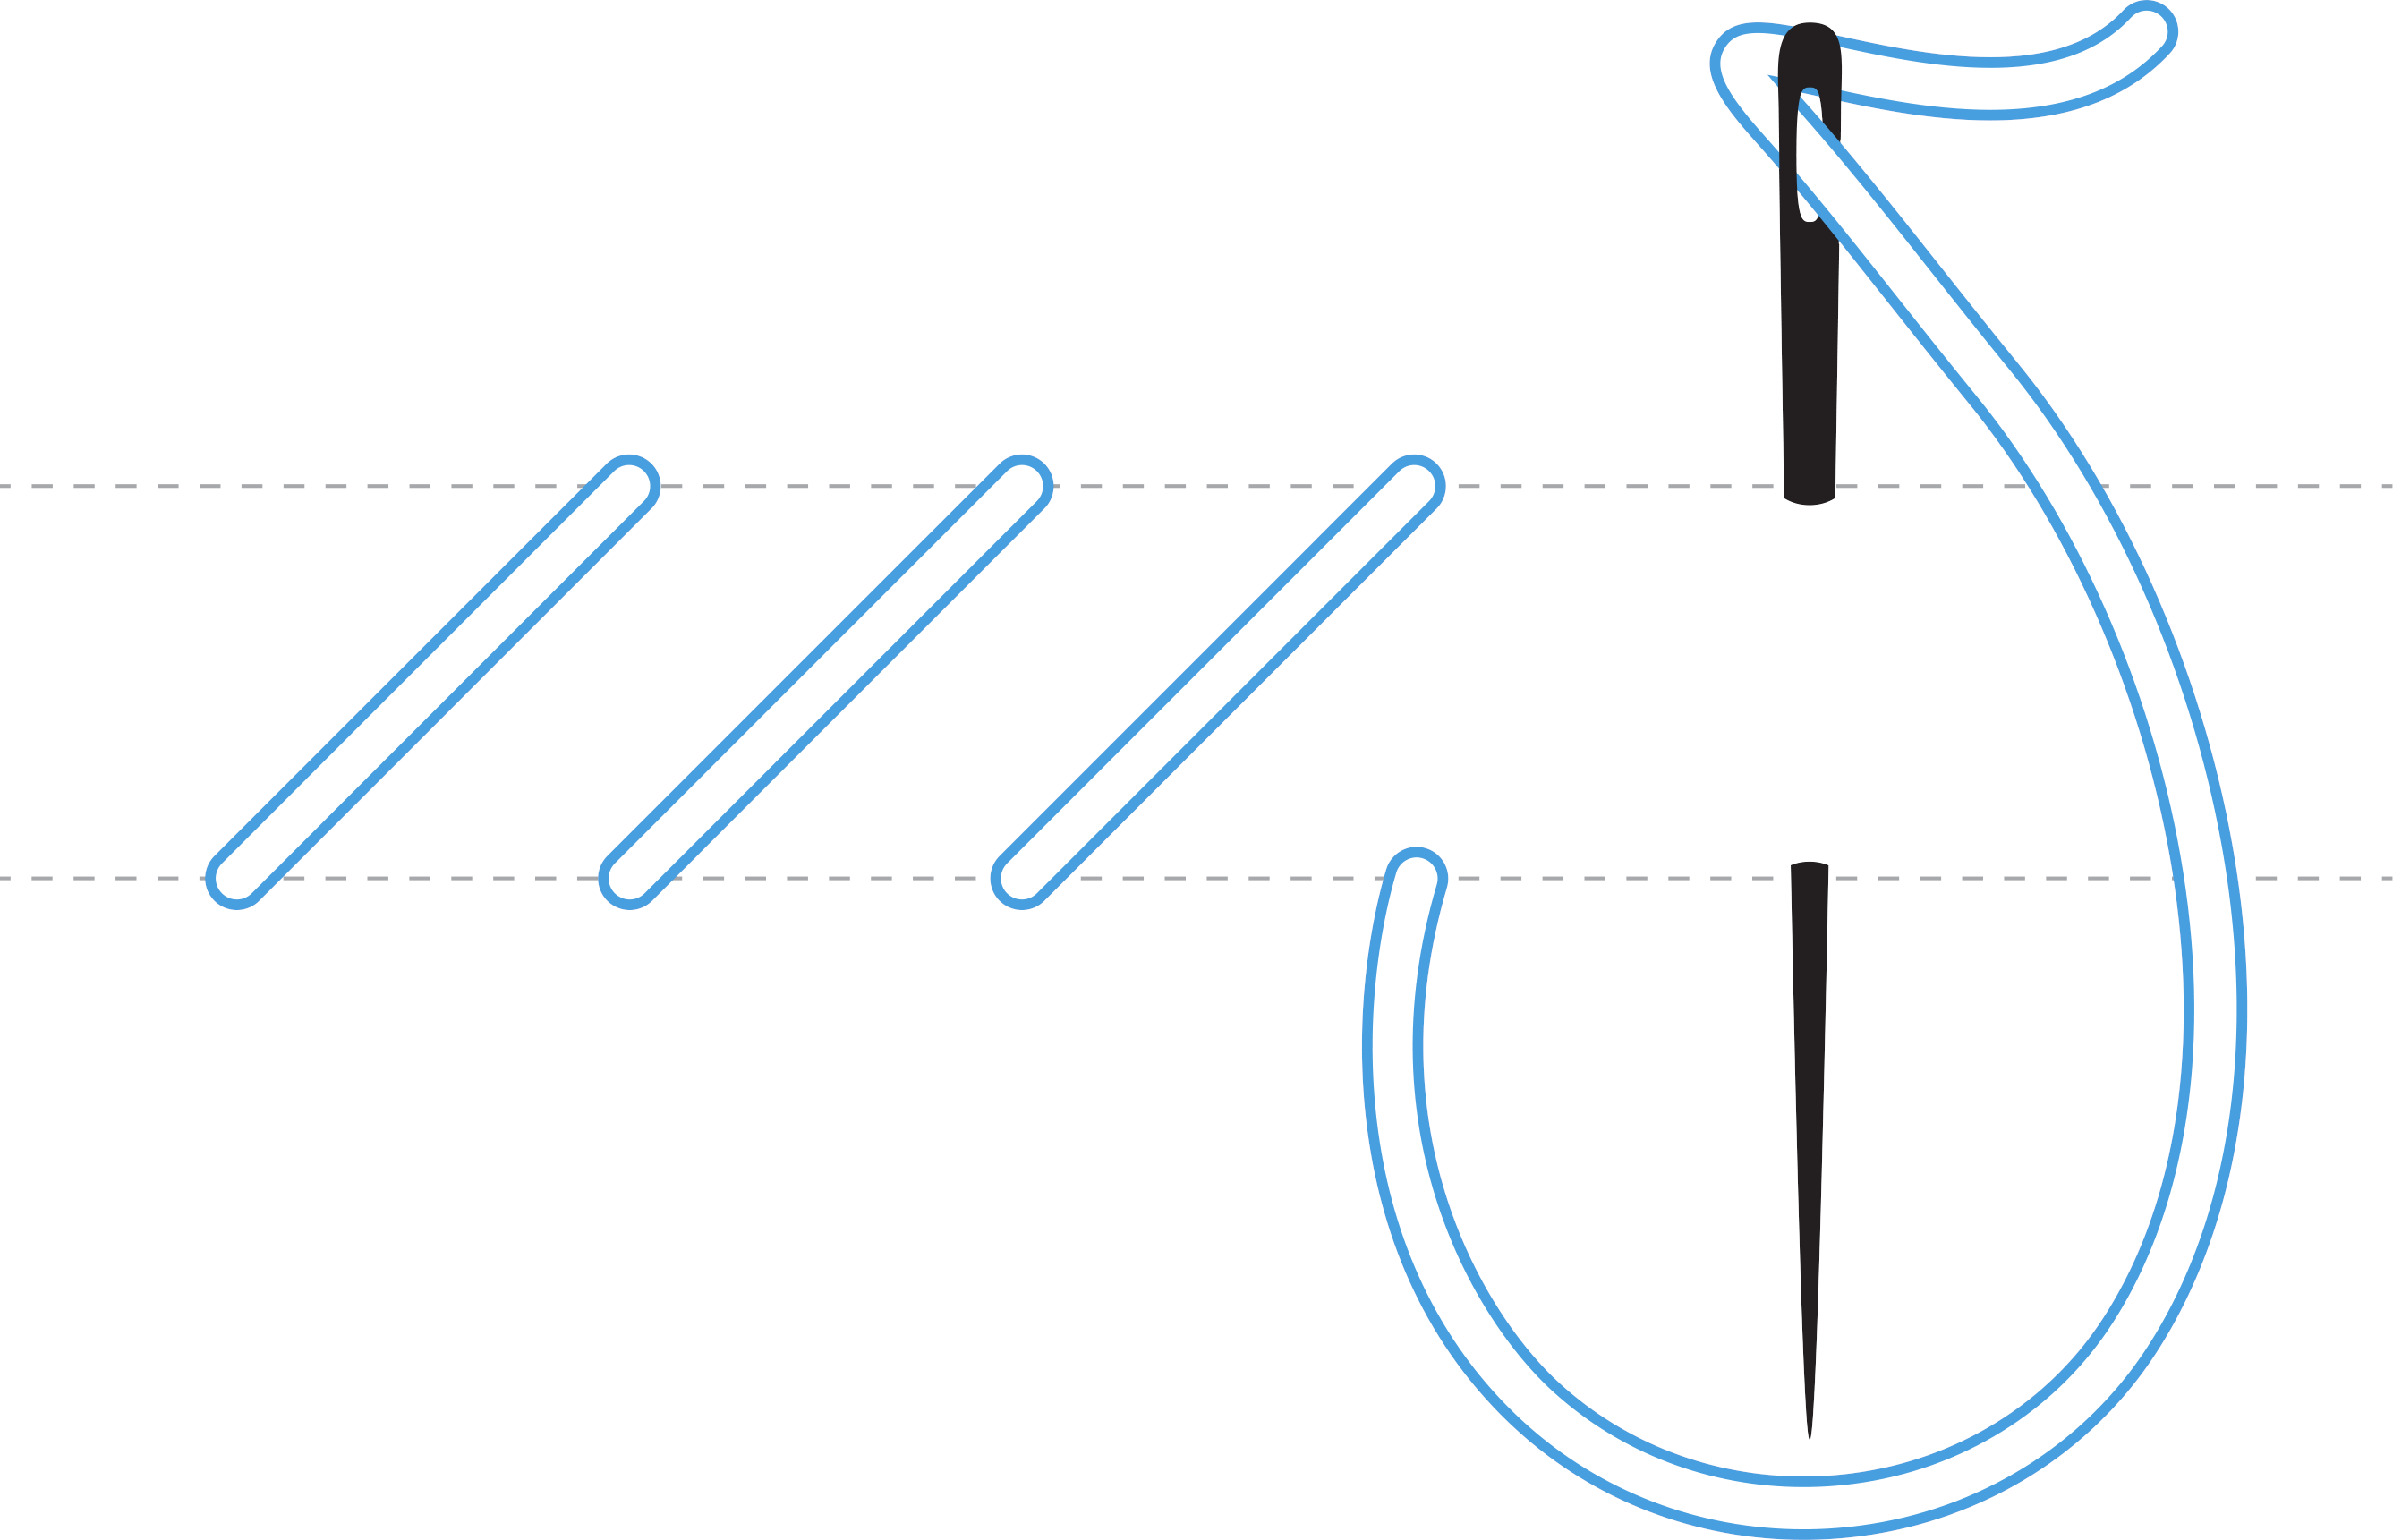
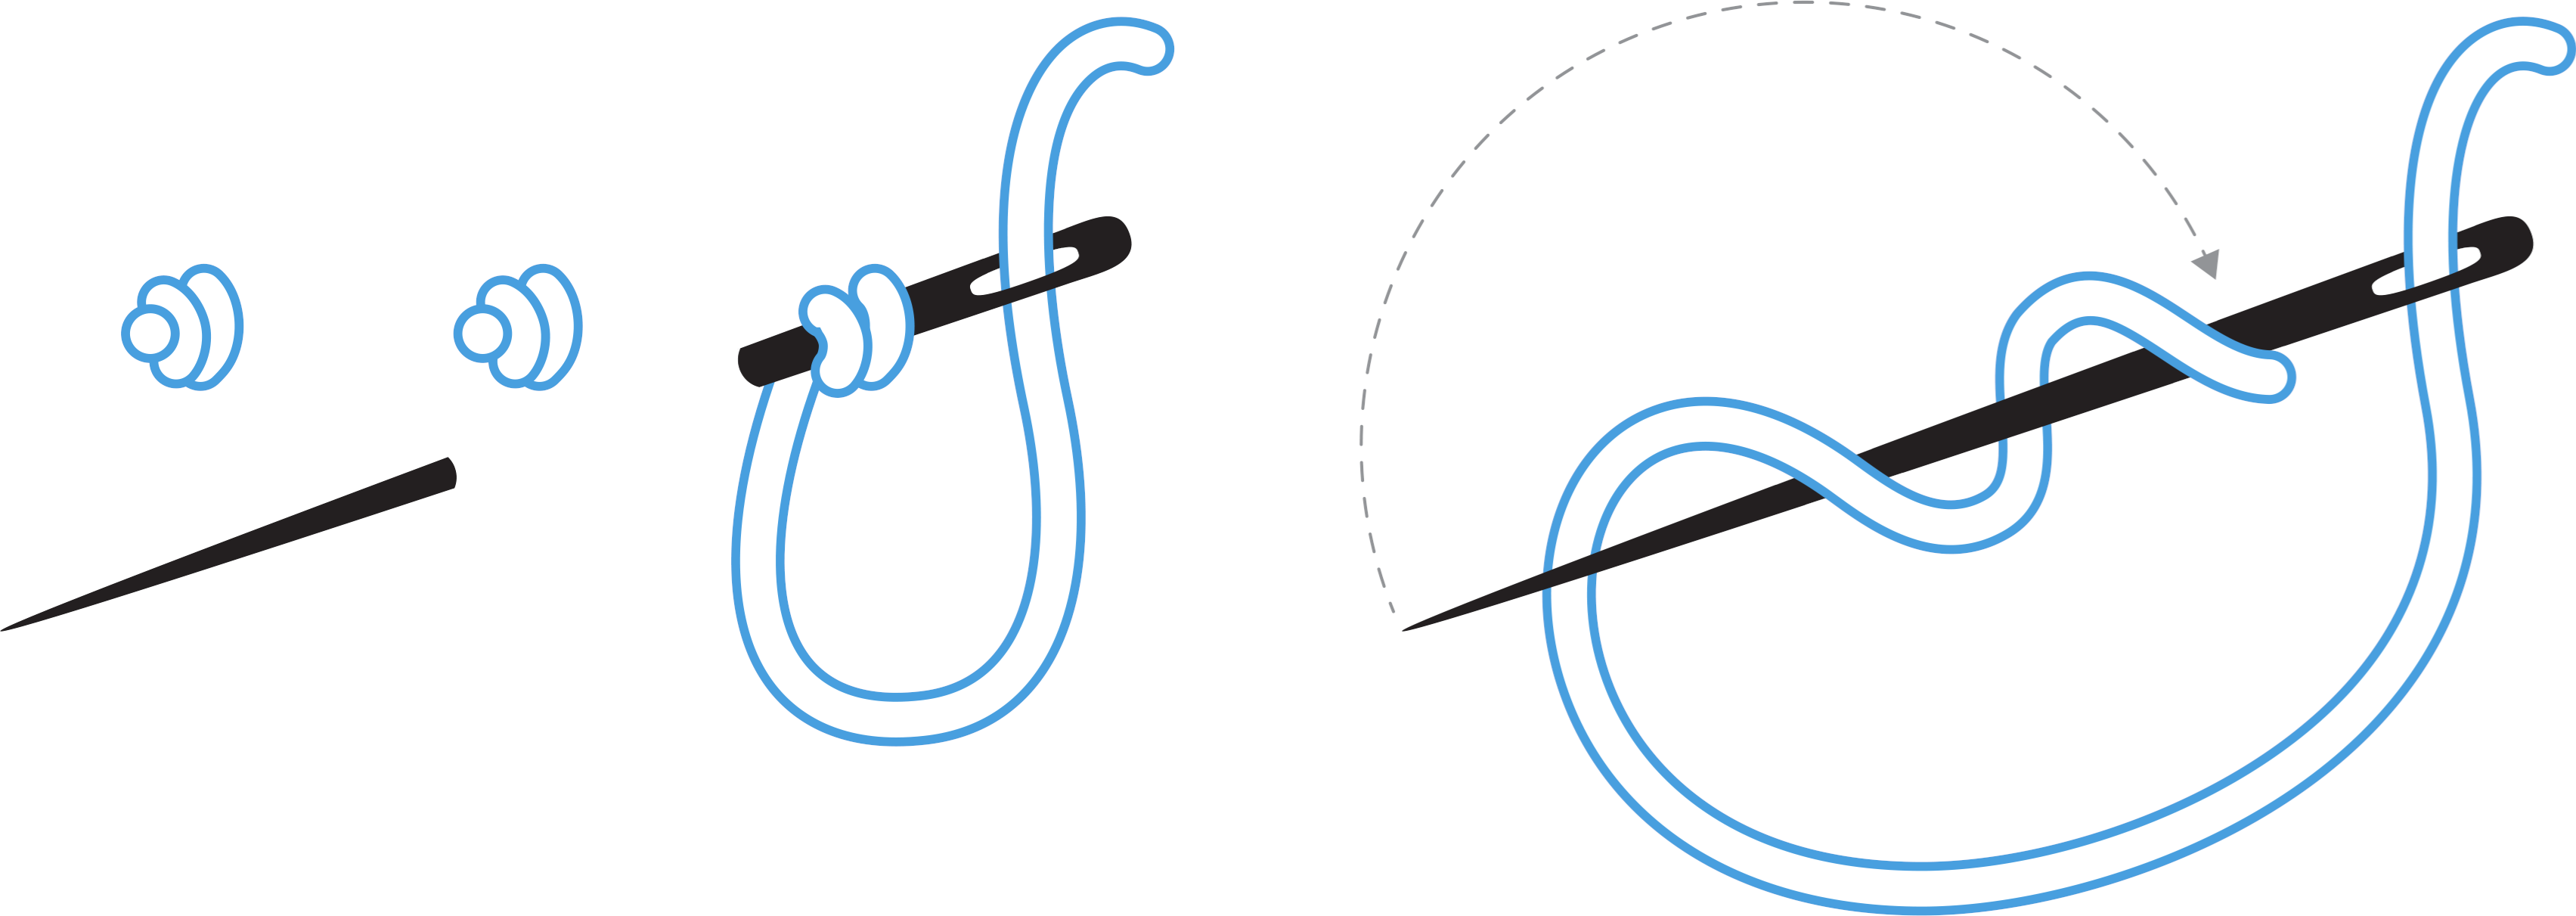
This is how you split your embroidery thread

Cut a piece of your embroidery thread (approx. 50 cm) and separate a thread by slowly pulling it out from the remaining threads. Pull out the number of threads you need and reconnect them by holding them together at one end and gently running your hand over them. This way you will make them hang together again.


If, while embroidering, you run out of thread in the colour you are embroidering with, you have the option of tacking the end to the back and starting a new thread.

DIY1026 Embroidery Flowers Steps

You can get different types of embroidery needles - in different sizes.


Embroidery needles without point are suitable for embroidery fabric with marked squares (e.g. Aida fabric and stramaj fabric), while embroidery needles with point are suitable for embroidery in dense fabric.


Choose the size based on how many threads you need for the specific embroidery. For example, if you are embroidering with two threads, choose a thinner needle than if you are embroidering with four.

Start by inserting your needle into the fabric from the back, leaving a piece of thread behind. Later, attach this thread by pulling it through some of the stitches on the back of the embroidery.


Do not tie knots

Always start and finish each new thread by attaching it in stitches on the back - make sure to attach in the same colour thread. Do not tie knots - otherwise you may get an uneven result.

DIY4018 Step

There are many types of embroidery stitches, which give very different expressions. We've gathered 10 of the most common for you here - along with illustrations.

Maybe you have already tried cross-stitch embroidery as a child? The technique is probably the most used of all - and it's easy! That's why we highly recommend it for beginners.


How to make cross stitch:

A cross stitch consists of a bottom stitch, which you sew from left to right - and a top stitch, which you sew from right to left. The finished stitch forms a cross on the right side.


You need to sew the stitches from the top down - first the whole row of bottom stitches, then the row of top stitches. However, you can also sew one cross-stitch at a time.


For cross-stitch, we recommend embroidering on Aida embroidery fabric, which has clear squares for the purpose.

01.Korssting

The cross stitch's little sister, the half cross stitch, is also a wonderful technique that gives a nice surface a la a herringbone pattern when you tilt it alternately to the right and to the left.


How to make half stitch:

Use exactly the same method as for cross-stitch, where you make a row with bottom stitch. The only difference is that you don't have to make the row with topstitch afterwards.

02.Halvekorssting

This type of stitch is sewn diagonally and can be sewn both right and left. You can use them to outline motifs, letters, etc. - and you can also just use them to make straight lines and curves.


How to make contour stitch:

Insert your needle through the fabric from the back, and insert it back down a little from there on the line of your drawn design. Then stick your needle back up next to your first stitch (about half the length of the stitch). Tighten the embroidery thread and repeat the process.

03.Kontursting

Running stitches and back stitches are uniform stitches you can use to embroider small details and outlines - or just to make lines.


How to make running stitch / back stitch

Stick the needle up through the fabric and then back into the hole where the previous stitch ended. Then bring the needle one stitch-length forward in front of the new stitch.

04.Stikkesting Bagsting

French knots are a wonderful type of stitch that work both individually and as a group on your embroidery.


How to make French knots

Start by sticking the needle up where you want to make the French knot, and wind the thread around the needle two or more times, depending on how strong/large you want the knot. It is important that you twist the yarn from the eye of the needle towards the tip. Now stick the needle down through the fabric close to the point where you stuck the needle up. Hold the twist with a finger as you pull the yarn (gently) through on the wrong side to form the knot.

05.Franskeknuder

Flat stitching is great for embroidering smaller areas where you want some volume. This could be letters and such.


How to make flat stitch:

Flat stitch can be made with both straight and slanted stitches and make them simply by sewing over your shape. It is important that you sew the stitches close together.

06.Fladsyning

Chain stitching is incredibly easy to make. They are small loops that together form a chain on the front of your project. You can use it to make letters and other simple designs, for example.


How to make chain stitch:

Stick your needle in the top point of your drawn design and put your thread down to the left in a small loop. Put the needle back down where you pulled it up, then sew a stitch length back down, keeping the loop under the needle. Repeat several times to create a chain. Finish by sewing the last loop in place.

07.Kædesting

Spiral stem stitches provide a great volume and decorative look to your embroidery project. Use them to make flowers, leaves and similar motifs.


How to make spiral stem stitches:

Stick the needle up through the fabric from the back and sew a backstitch - but leave the needle in the fabric. Now wind the thread several times around the needle - wind from the eye of the needle and out towards the tip. Make the number of twists that roughly matches the length of your backstitch. Hold onto the twists as you pull the thread through until there is resistance. Push the cords into place and insert the needle into the fabric in the same place you made the backstitch. Pull until the spiral knot lies flat.

08.Spiralknude Forlængetknude

This type of stitch gives a nice, almost leaf-like shape. The technique is very similar to flat stitching.


How to make closed herringbone stitch

Make an outer and inner mark and embroider alternately from one side to the other.

09.Flettetfladsyning

The Blanket Stitch is simple and easy. It adds a really nice and decorative finish to edges.


How to make blanket stitch:

Blanket stitches are completed from left to right. Stitch up through the fabric where you want the bottom edge of the tongue stitch to be. Sew a vertical stitch from the top down, passing the needle over the thread. Tighten the stitch and continue.

10.Tungesting
DIY4018 Step3

  • Make sure your stitches are uniform in size. On Aida fabric, squares are already made for cross stitch - but in other cases it may be a good idea to use a ruler and a water-soluble marking pen to measure and mark the proper stitch length.
  • Keep the needle vertical when embroidering. This will give you the smoothest result and avoid wrinkles.
  • Keep the tension on your thread the same by pulling on each stitch with the same force. The stitches should be neither too loose nor too tight.

There are many options when you start embroidering. You can make small and large floral embroideries, embroider with sequins, and create small embroidery on knitwear, embroidery on clothes, embroidery on cushions - and much more.


Let's go through some of the many great options.

You can easily create your own flower embroideries!


For example, draw a single flower or a larger floral design on 1:1 paper - or use one of our lovely free templates with different flowers.


Then choose the colours of embroidery thread you want to use and use the water-soluble interlining method described earlier in this guide.


You can find all our embroidery templates right here. Do you like poppies, daisies and tulips - or do you have another favourite flower?

Do you love sequins? Then you'll definitely love making nice embroidery with them too. It's a slightly more time-consuming process - but well worth it! You can decorate the neck of a knit sweater, for example, for the prettiest look.


How to attach the sequins:

Se our DIY guide here.

Would you like to give your knitted sweater, scarf or hat lots of personality with your own embroidery?


Then check out our free guide to embroidering on knitwear here. You'll also find great motifs to work from: cherries, a lightning bolt, a smiley face, a snake - and much more.


NOTE: For this DIY, you'll need wool yarn instead of embroidery thread and a darning needle instead of an embroidery needle.


If you want to embroider with embroidery thread on knitwear, you can make beautiful flowers on your socks, for example.

DIY1047 Image 1

It's great to make your own clothes, and the little details always make a big difference to the look. Embroidery is a magical technique for the purpose, and there's almost no limit to how big or small you can make it.


Make a bold detail on the back of a hoodie or denim jacket. Alternatively embroider a pretty floral detail on your shirt or maybe a floral motif on the chest of a breezy dress for the family's youngest?


New life to old clothes

Has the kindergarten child punched a small hole in his trousers? Or is one elbow of your favourite jumper torn? Then the mending technique is brilliant to repair with!


Simply place a small piece of fabric under the hole and rip it in place with straight stitches in different directions. You'll get the most creative patterns that make your clothes unique - and give them a few extra years in your wardrobe.


For this technique you will need wool darning yarn for knitting - and the cotton version of the yarn for denim and canvas.

Make your cushions even more unique with your beautiful embroidery. Here you can fire up the motifs and colours to match your decor. Perhaps you'd like to create a delicate bird motif?


You could also go for a cushion with a completely graphic cross-stitch pattern - the possibilities are endless!

DIY4018 Step6
DIY1028 Face Punchneedle

Are you up for even more - and maybe a different embroidery style? Then try punch needle!


This method allows you to create the most amazing projects; wall hangings, cushion fronts, key rings and much more. Make small, delicate projects, or move into larger ones where the whole fabric is filled in.


Find everything for punch needle here, where you also get a guide to the embroidery technique at the bottom of the page.

Looking for even more inspiration?


Then explore our vast embroidery universe with more than 600 different colours of embroidery thread - and everything else you need!


You'll find it all right here.

Share your creations with us on Instagram! Use the hashtag #selfmadecreators so our many followers and we can be inspired by your embroidery.  


We can’t wait to see it!

Find us on Instagram